From the Viewer, click the Correlation Panel Button in the left-hand button tree
Open Scene Control. The tabs are ordered in the general workflow order
Navigate to the Wells tab
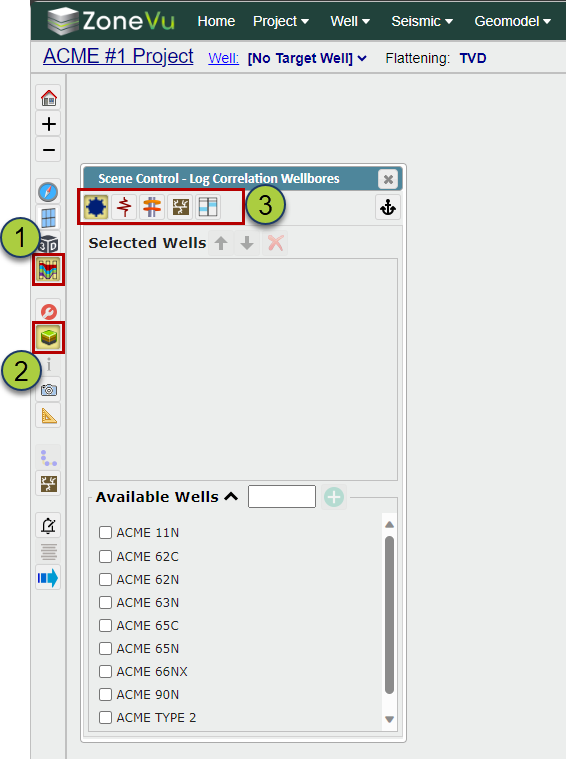
Wells Tab:
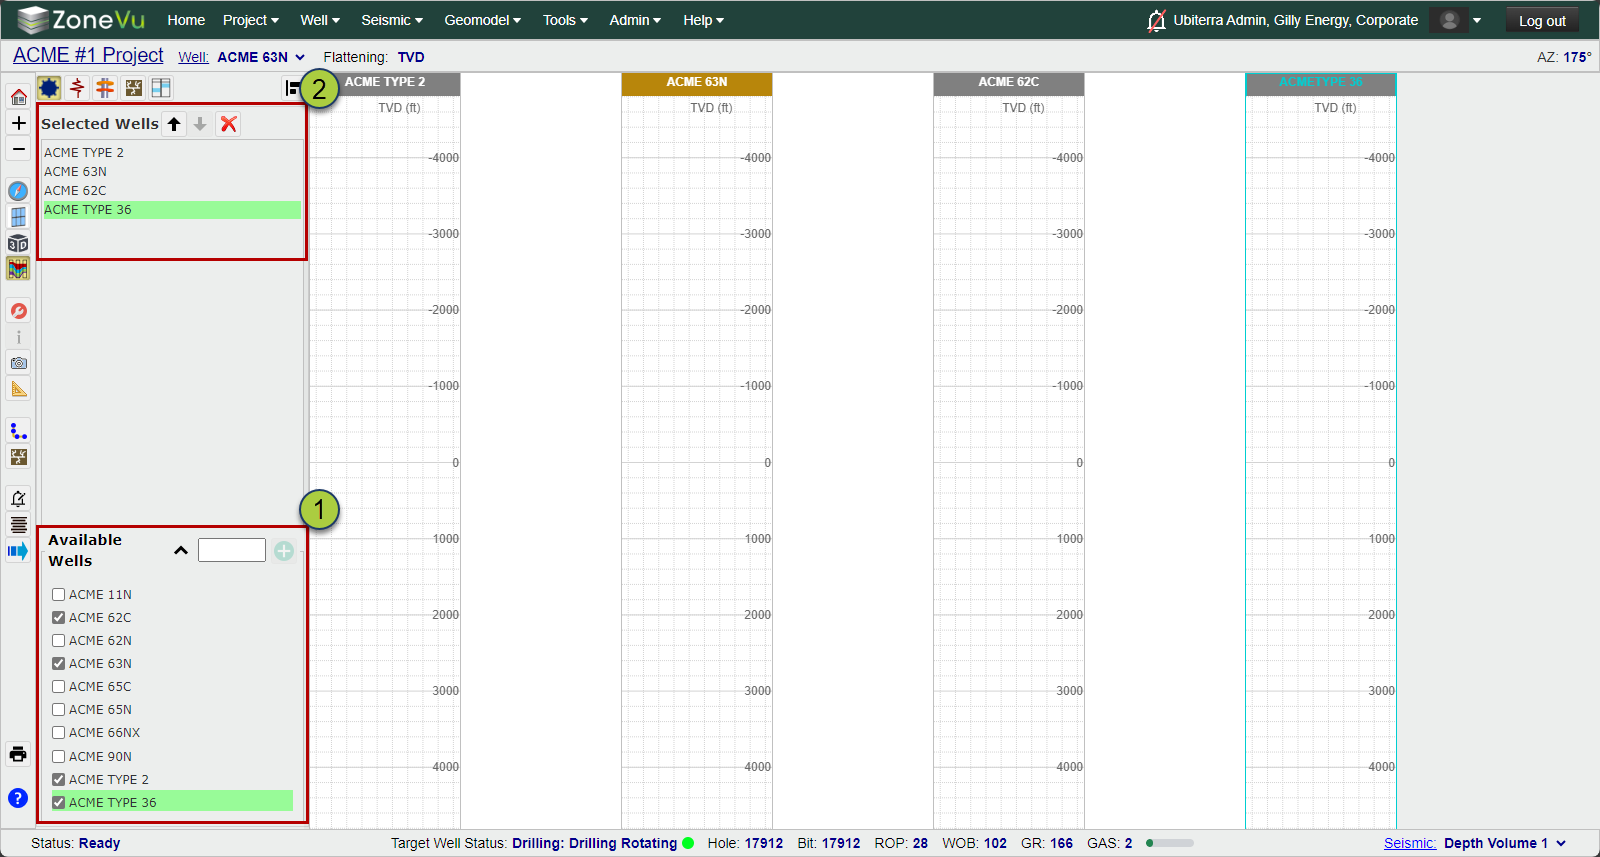
Use the checkboxes in the "Available Wells" section to add Wells to the Correlation Panel
There is a filter box allowing you to pare down the list of Wells
Note: You can use SHIFT or CTRL select to bulk select more than one Well
The order of the Wells in the "Selected Wells" section shows the ordering Up-Down = Left-Right
You can select one or more Wells and use the arrow buttons to adjust the ordering or use the red "X" to remove the Well(s) from the Correlation Panel
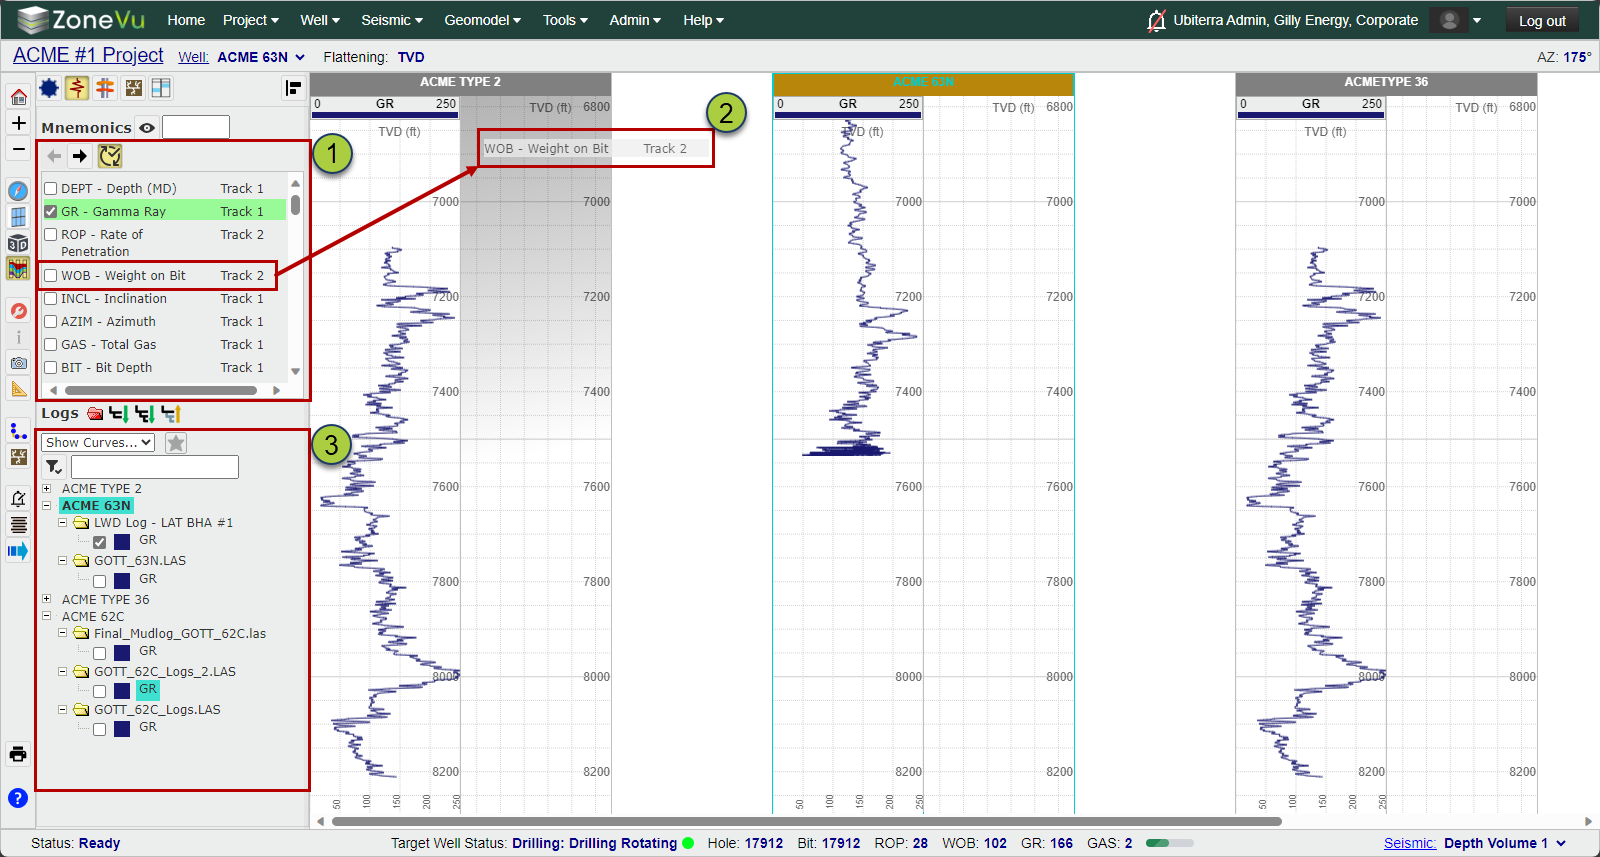
Logs Tab:
Use the Mnemonic tab to turn on different Log Sets.
ZoneVu will use a Starred/LWD/LAS logic to select a Curve to display
You can filter the Mnemonic list to find your Log Curves more quickly
Use the arrows to move Log Curve Sets into different Log Tracks and/or create new Log Tracks
ZoneVu does support Drag-and-drop log Mnemonics from Scene Control to a Log Track
The Log Curve Data Tree is located below the Mnemonic section, listing all of the displayed Curves. Use the checkboxes to turn on/off any curve.
You can turn on more than one curve of the same Mnemonic
Use the Filter input to pare down the data tree and quickly find the exact curve you need to use
Tops Tab:
Select which Formations you want displayed
Use Shift/Ctrl select to quickly choose the Formations you want displayed
You can also bulk adjust the display settings for the selected Formation
Use the 'Global' controls to choose if you want Litho Textures and color fill in the Log Tracks and Gutters, as well as the formation pinch out display
You can override these 'Global' controls in the Track tab for one or more Tracks
The Tops data tree will list all Tops for every well
ZoneVu uses a Mine/First search logic to select what Tops to turn on. ZoneVu will first search for Tops created by your User Profile. If none can be found, then ZoneVu will select the first top encountered (Top with the smallest MD)
Use the filtering option to find the tops you need displayed quickly
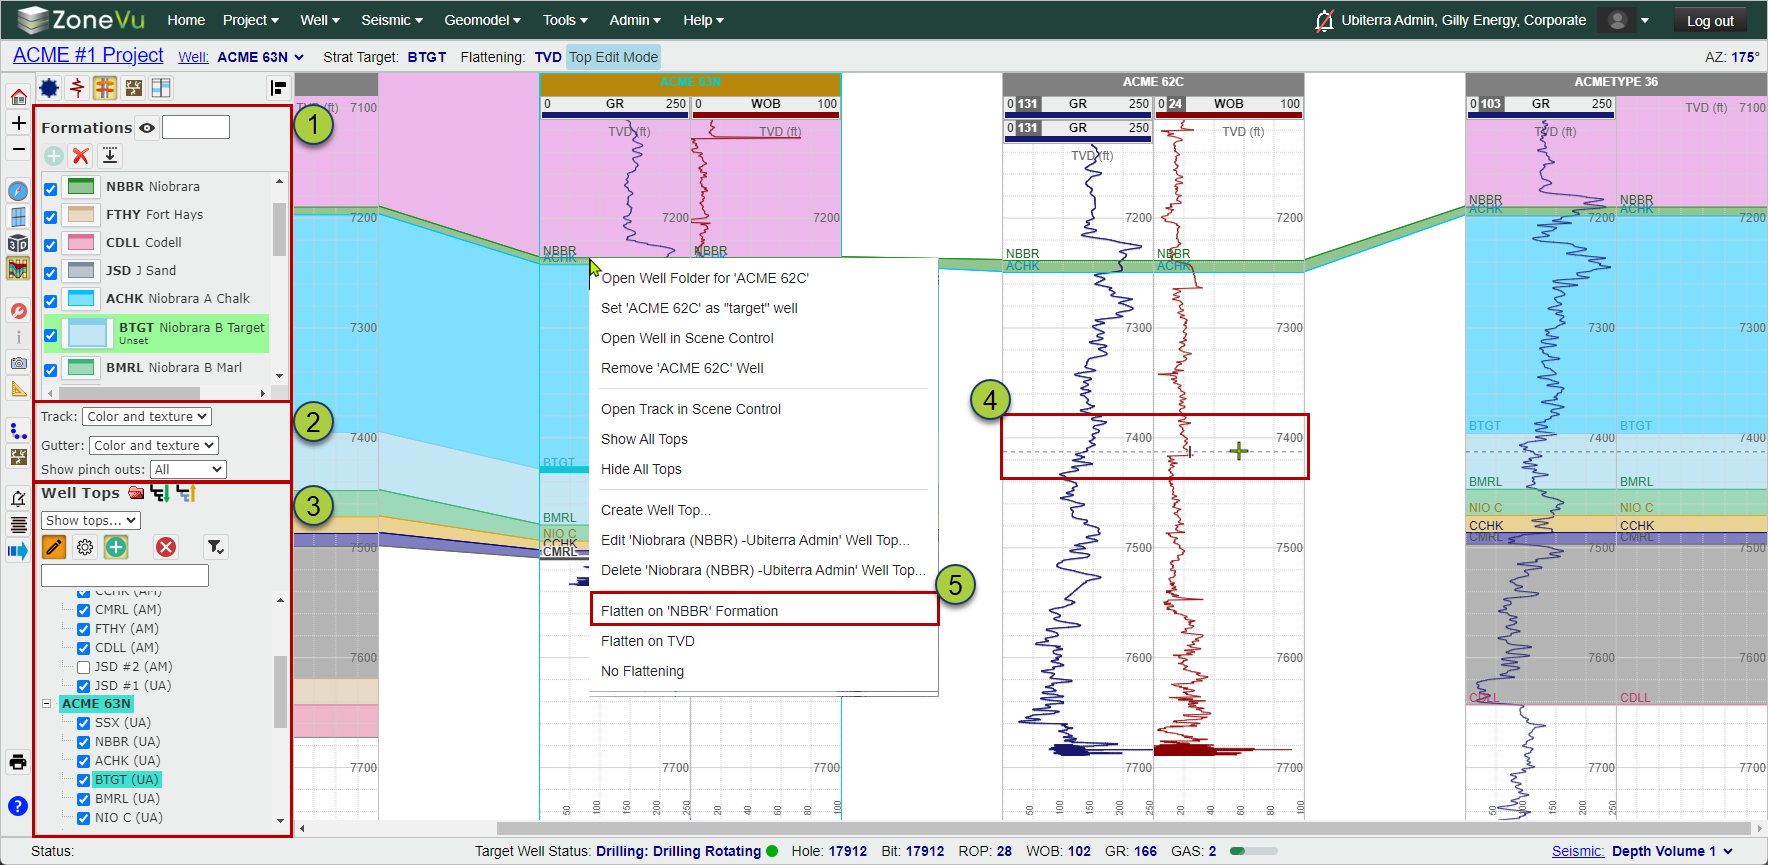
Pick Tops
Click "Alt + E" on your keyboard to activate Top Edit mode (note how the pencil icon has an orange background, similar to Geosteering Mode)
Select a Top to pick in the Correlation Panel or the Formation List
Hold "Ctrl" on your keyboard and left-click in a log track to create a new Top at that depth. While holding "Ctrl", you can pick this same Top across multiple Wells
To adjust an existing Top, select the Top in a Log Track and Drag the Top to the correct location
You can Flatten the Correlation Panel on a Formation by right-clicking on the Top and selecting "Flatten on 'XXXX' Formation"
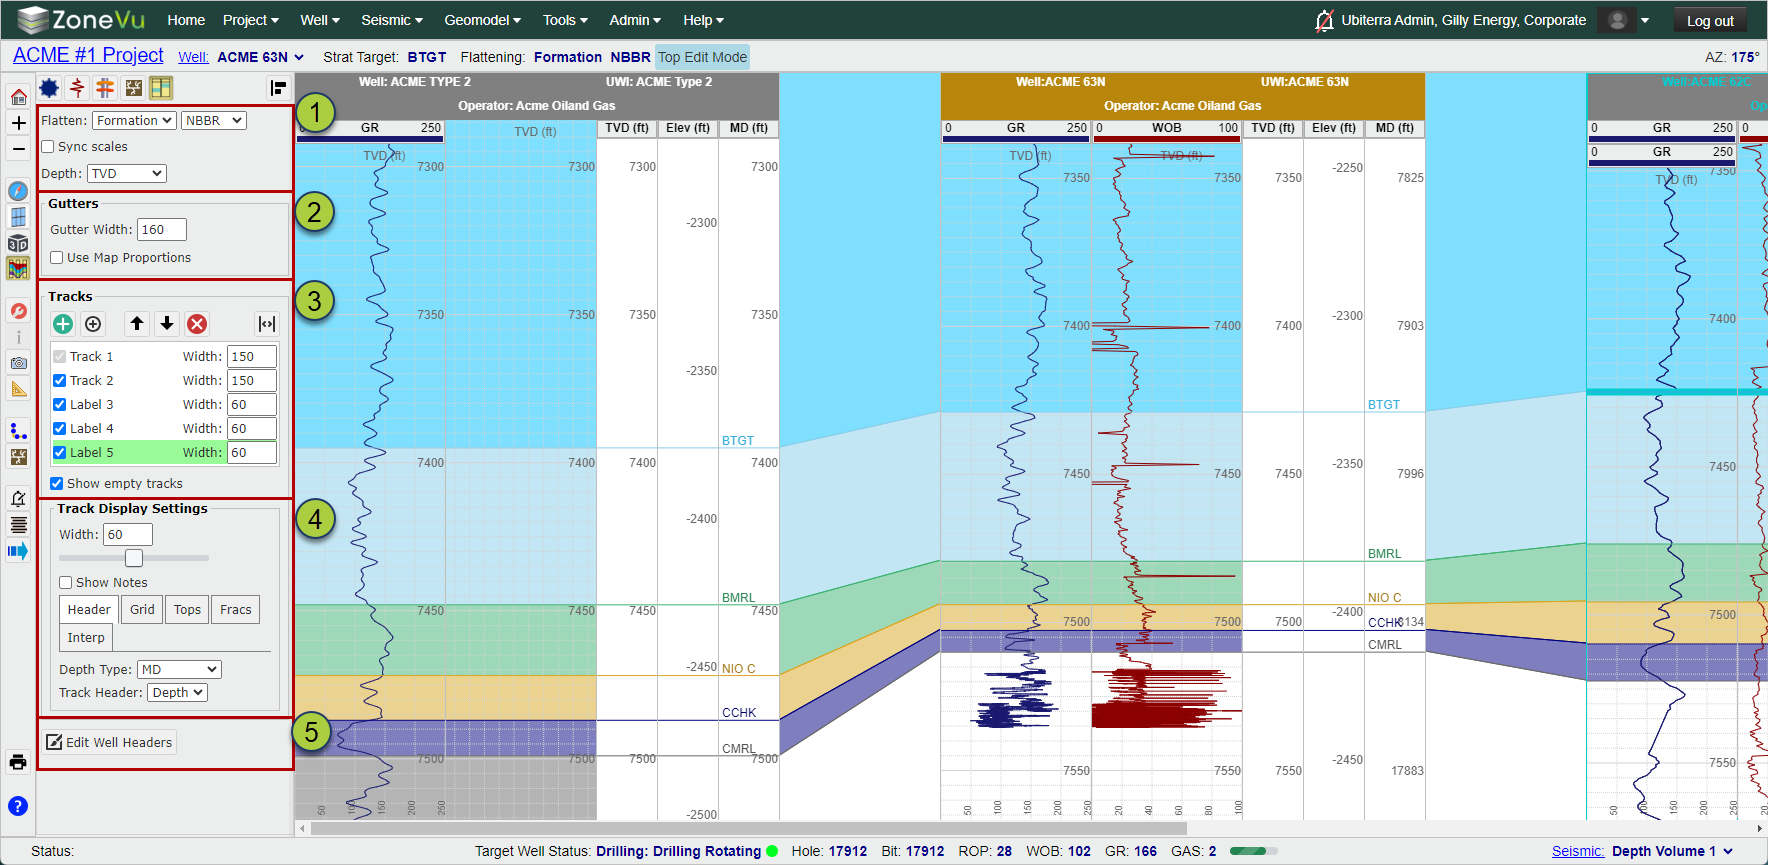
Tracks Tab:
The Tracks tab allows you to control and customize the Log tracks in-bulk or individually
Control flattening of the Correlation Panel and log Scale (MD, TVD, Elevation)
Control the Gutter width and Spacing Type (Static, Proportional Map Distance)
Adjust Track size, ordering, Add/Remove Log & Label Tracks
Customize the style and data displayed in one or more tracks
Customize the data displayed in the Well Header