
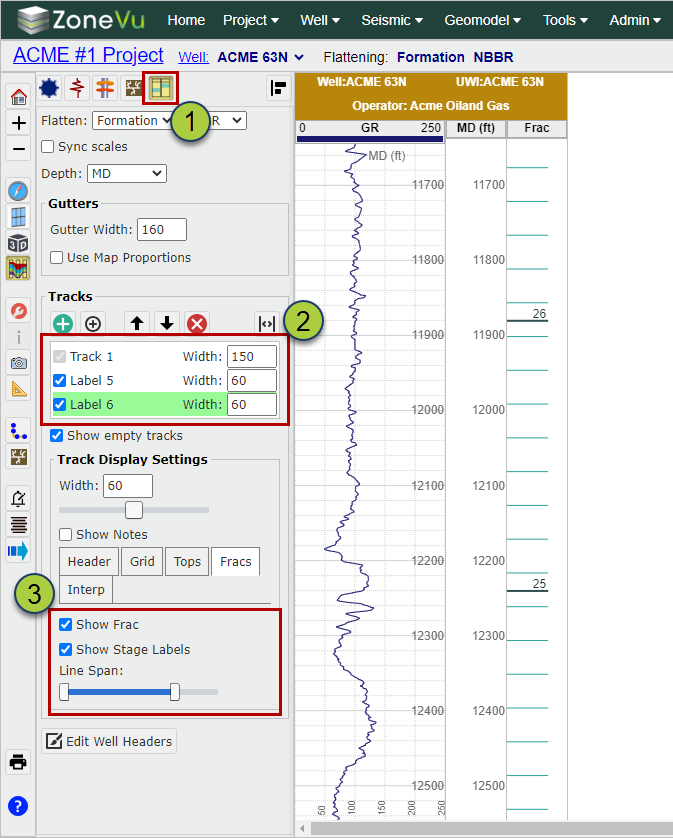
Turn on Frac Display in one or more Tracks:
Navigate to the Tracks tab in Scene Control
Select the Tracks you want the Frac Data displayed in
In the "Track Display Settings" section, select the "Fracs" tab and check on the "Show Frac" checkbox
You can turn the Stage Labels On/Off with the "Show Stage Labels" checkbox
The "Line Span" sliders let you control how far across the track the Plug and Cluster lines are drawn
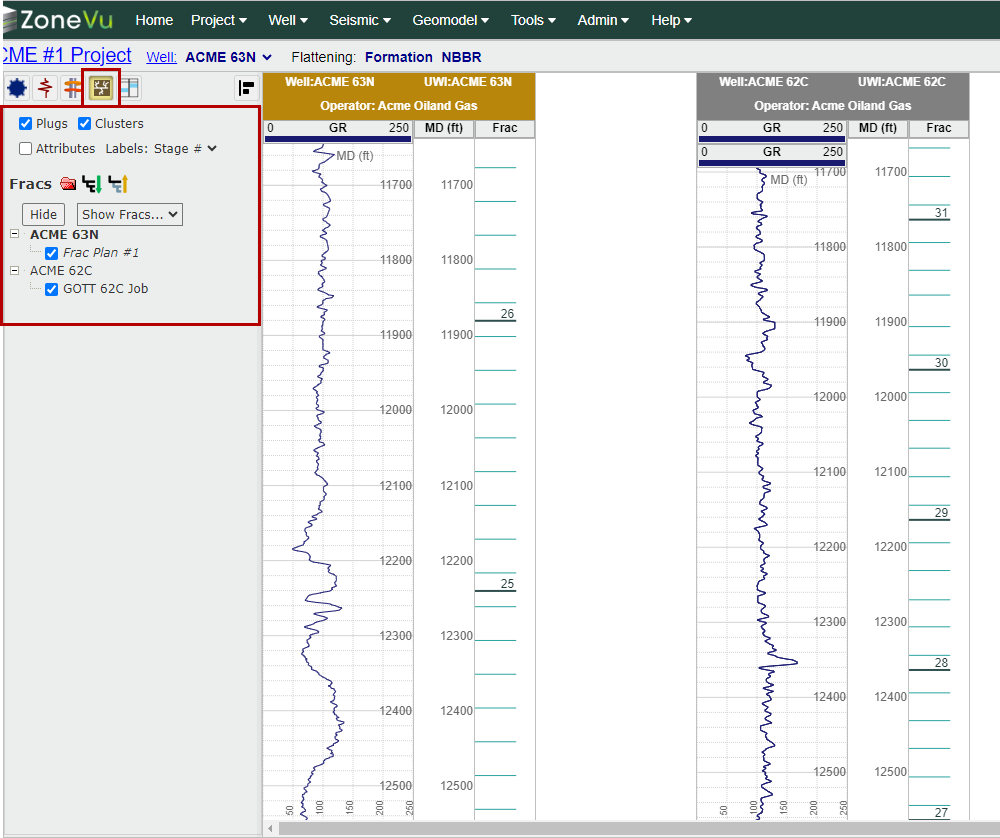
Navigate to the Frac tab in Scene Control to choose which Frac dataset to display on which Well
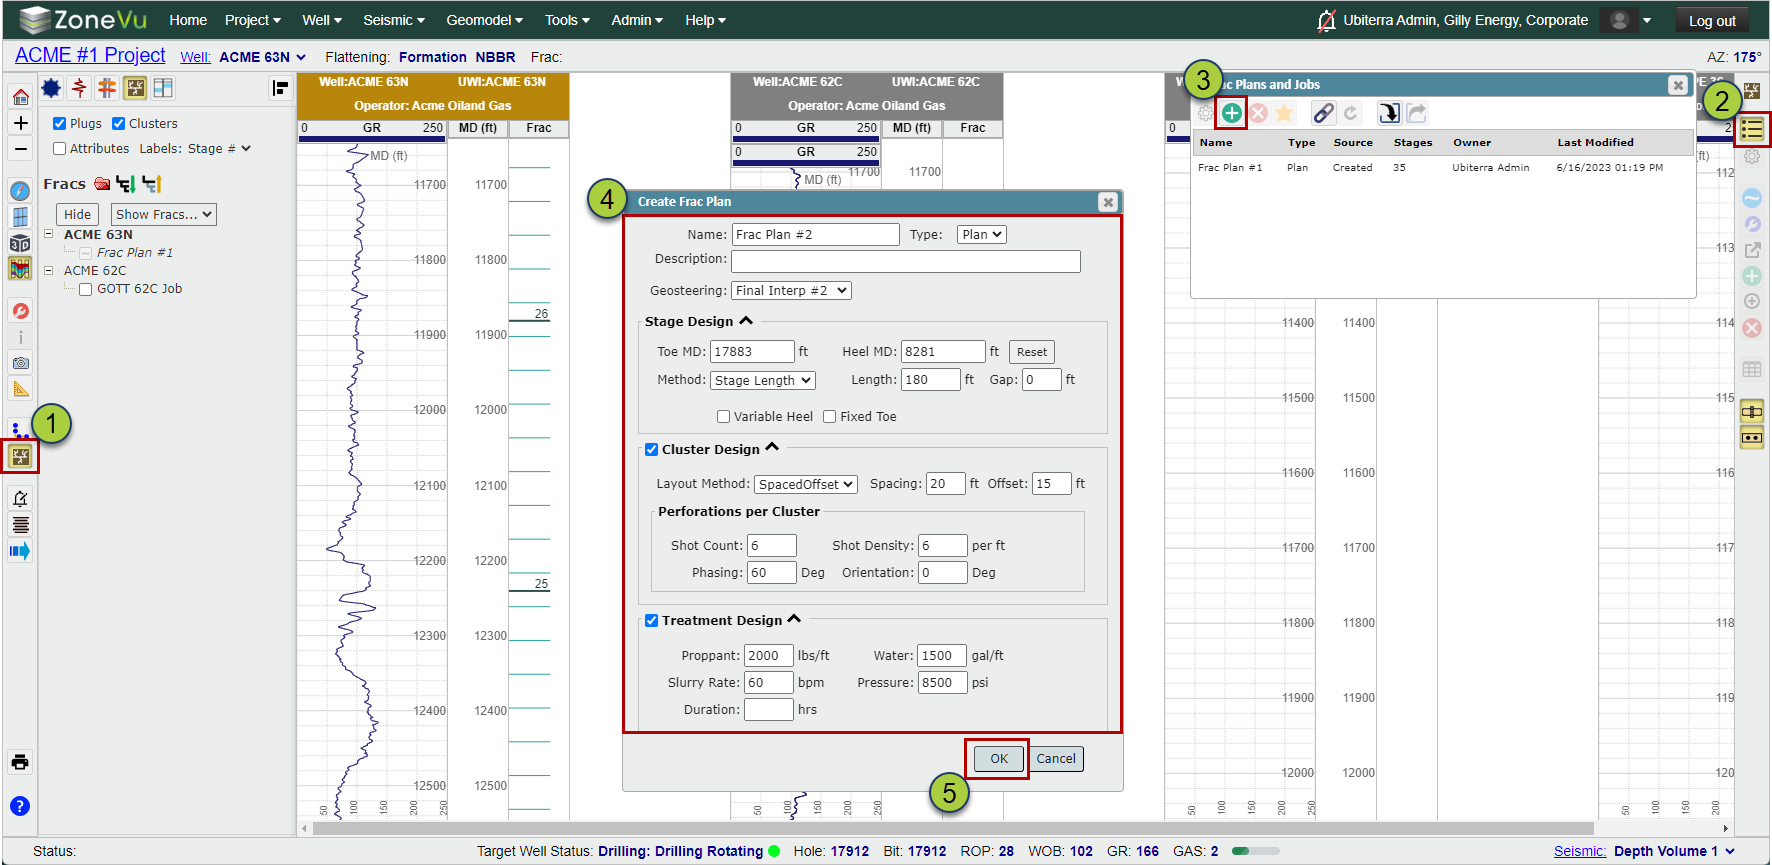
Creating a Frac on the Target Well:
To Create a Frac on the Well, open the frac module
Open the Frac List
Click the "Create" button
Fill out the Frac Design
Click "OK" to create your Frac
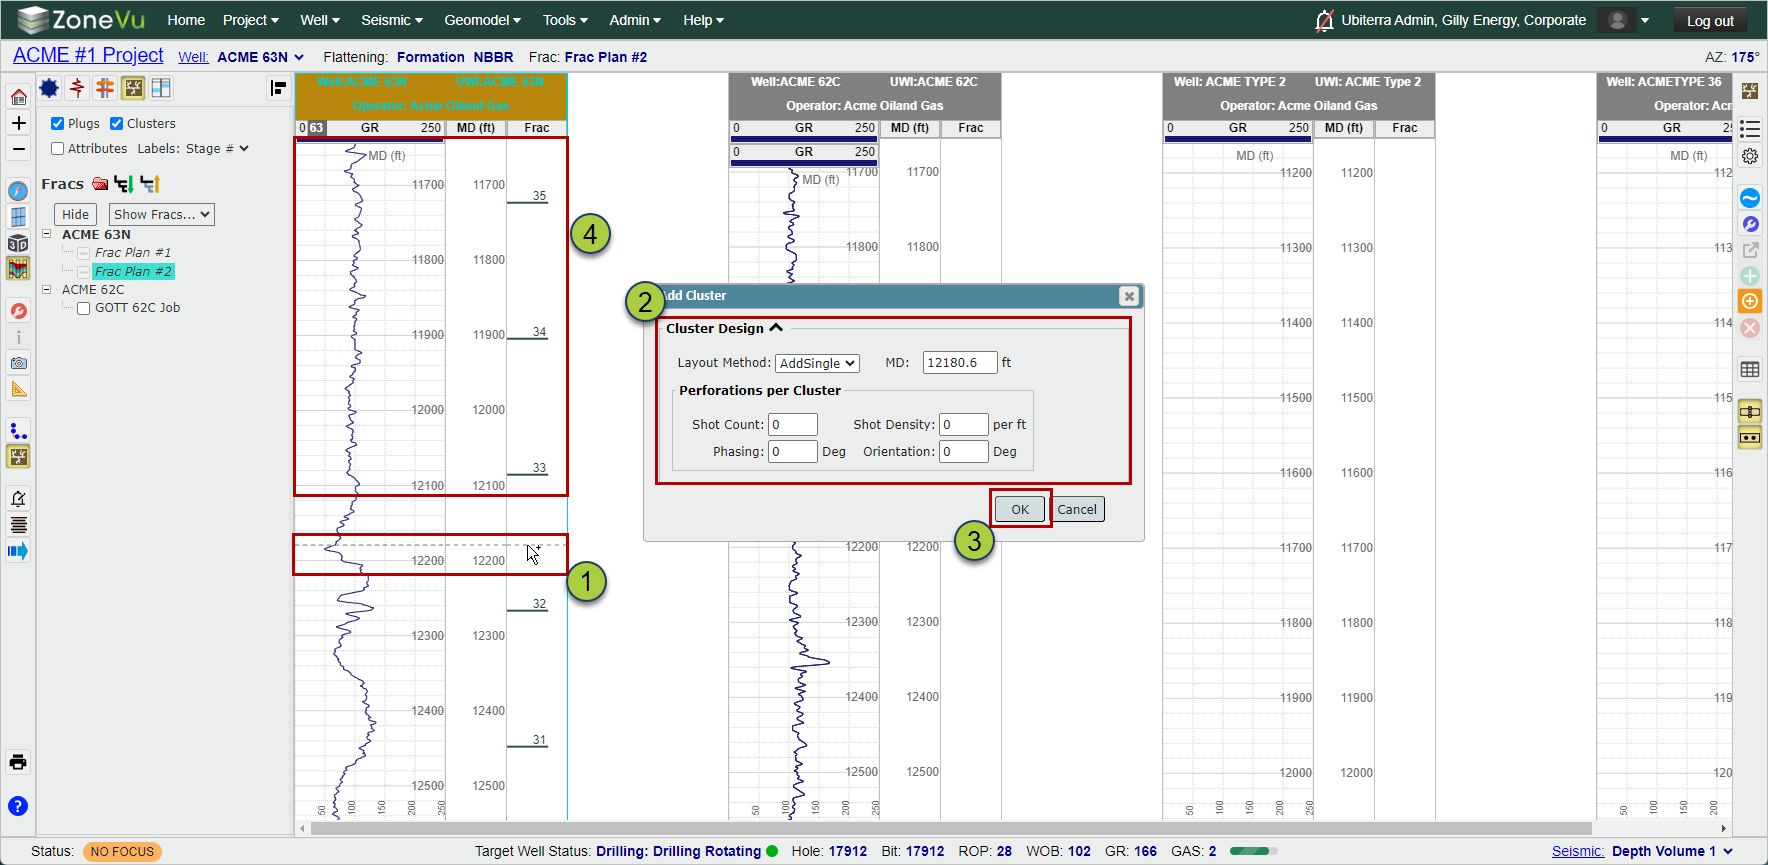
Editing a Frac:
Once you have created a Frac, you can pick Cluster locations on the Target Well
With the correct Frac selected, hold "Ctrl" and click in the log track to pick the first Cluster location
A dialog allowing you to specify the Cluster design will open
Click "OK" to create the first Cluster
Now that you have created the first Cluster, you can hold "Ctrl" to pick other clusters. ZoneVu will use the design you just specified for all subsequent clusters
You only need to fill out the Cluster design dialog on the first Cluster created
Note: you can also grab any existing cluster and slide it up/down to adjust its placement
Displaying Frac Logs:
You can display any Frac Log in the Correlation Panel
Navigate to the Logs tab in Scene Control
Scroll down the Mnemonic list to find the Frac Logs
Drag-and-drop or check on the Frac Logs to display them in the Correlation Panel
