ZoneVu Frac allows you to skip Stages and redesign a single stage, a range of Stages, or every stage in a Frac. This redesign can be the Stage Layout, and/or the Cluster Design, and/or Treatment Parameters. This allows you to design a Frac with an initial design, then interactively work down the wellbore adjusting the Frac design to account for wellbore, geologic, or geophysical constraints or issues. This article will walk through the process of redesigning an existing Frac in ZoneVu.
Revising an Existing Frac:
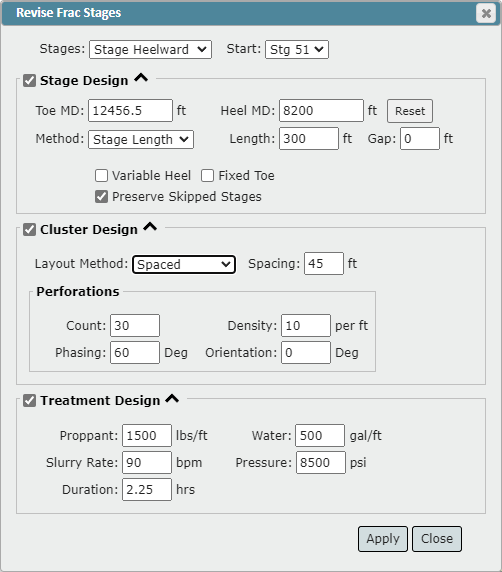
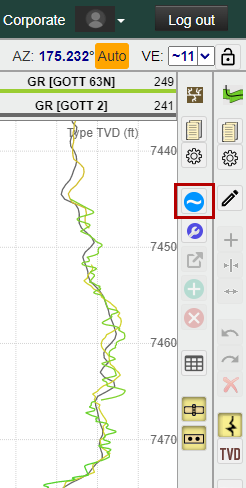
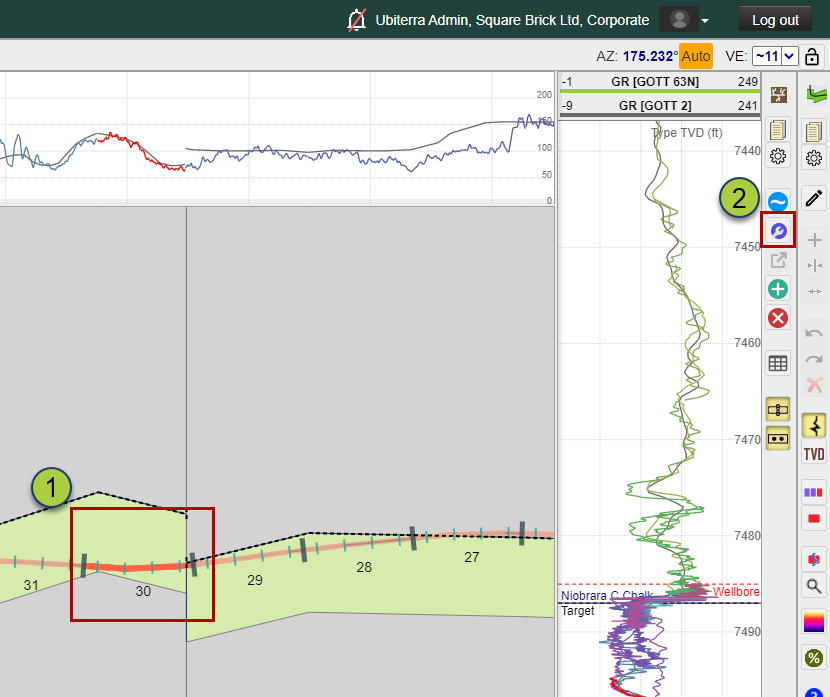
Select a single or range of Stages and click the "Revise Frac" button
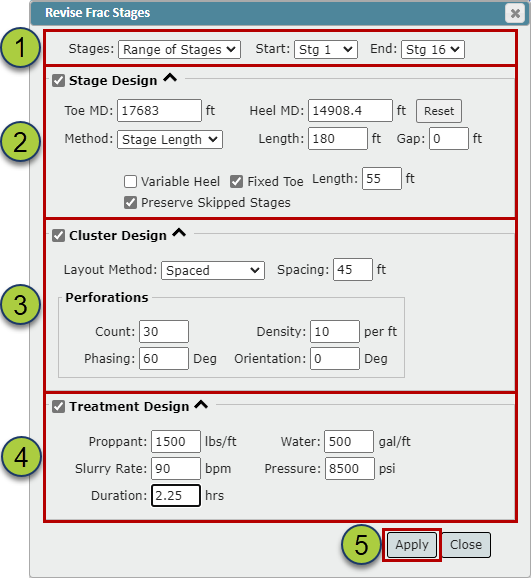
Here you can choose what segment of the Frac to redesign and if you want to redesign the Stage Layout, Cluster Design, and/or Treatment Parameters.
Select the Range of Stages to Edit:
All Stages: Redesigns the entire Frac
Stage Heelward: Redesign the Frac from the designated Stage to the heel end of the Frac
Range of Stages: Redesign the Frac between the defined Stages
Design the Frac Stages: (Optional)
Toe MD: The MD depth defining the start of the Frac
By default, ZoneVu will use the max MD of the well
Heel MD: MD depth defining the ending point of the Frac
By default, ZoneVu will use the MD depth where the wellbore reaches 88°
Method: Choose which method to layout the Stages
No. of Stages: ZoneVu Frac will evenly space out the specified number of stages between the defined MD depths
"Number" input: Defines the number of stages for the Frac
Stage Length: ZoneVu Frac will determine the number of stages of a defined length that fit between the defined MD depths
"Length" input: defines the length of each stage
Note: By default, ZoneVu Frac will determine the number of whole stages that can fit between the defined MD depths. This means that the final stage length may not match the defined length, but it should be +/- a few feet.
"Gap" input: Defines a distance from a Plug and the surrounding Perf Clusters that are not considered part of the completed stage length.
If the "Stage Length" is less than the distance between the two bounding Plugs, then the Gap Distance will be used to define this Stage offset length
"Variable Heel" checkbox: Makes the stage length match the Set Length, but the final stage may be less than the defined stage length to account for any excess wellbore length
"Fixed Toe" checkbox: Allows the user to define a different Stage Length for the first stage (Toe Stage)
"Length" input: Defines the Fixed Toe length if the Fixed Toe checkbox is checked
Preserve Skipped Stages checkbox: When checked on, ZoneVu Frac will preserve Skipped segments and update the Frac around these segments
Cluster Design: (Optional)
"Layout Method" dropdown: Choose a method to layout the Cluster design
Number: Define a set number of Perf Clusters to be placed in each stage
Spaced: Define the spacing distance between Clusters, ZoneVu Frac will determine the number of clusters that can fit within each stage
Note: By default, the Spacing half-length will be used to offset the first and last clusters from the Stage Boundaries
SpacedOffset: Define the spacing distance between Perf Clusters and the distance the first and last Perf Clusters are offset from the Stage Boundaries.
Note: This option should be used if you want to set a Stage/Cluster offset distance that is different than the Spacing half-length
AddSingle: Adds a single Perf Cluster at the center of the Stage
Perorations design:
Count: Total number of perforations in each cluster
Density: Perforations per distance (feet or meters)
Phasing: Radial degrees between perforations
Orientation: Degrees the first peroration is off vertical (+ = clockwise rotation, - = counterclockwise rotation)
Treatment Design: (Optional)
Proppant: Planned proppant (lbs/ft)
Water: Planned Water Volume (gal/ft)
Slurry Rate: Pumping rate (Barrels per minute)
Pressure: Planned treating pressure (PSI)
Duration: Anticipated Frac duration (Decimal hours)
Click the "OK" button to have ZoneVu Frac create your Frac
Editing the Properties of a Single Stage:
You can also edit a single stage by selecting a stage in the Cross-Section and
Clicking the "State Properties" button
The General tab: Lists all of the information related to this stage including the Perf Cluster Info.

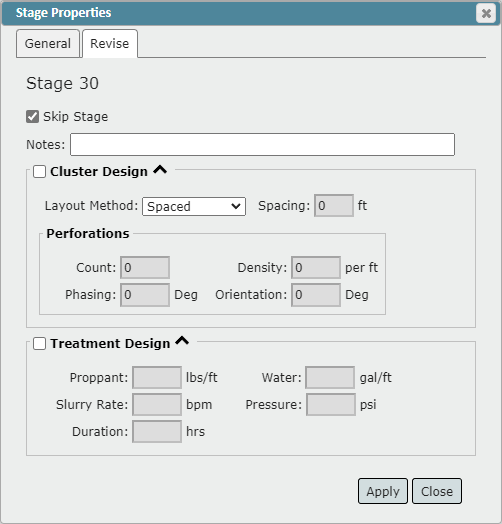
Revise tab:
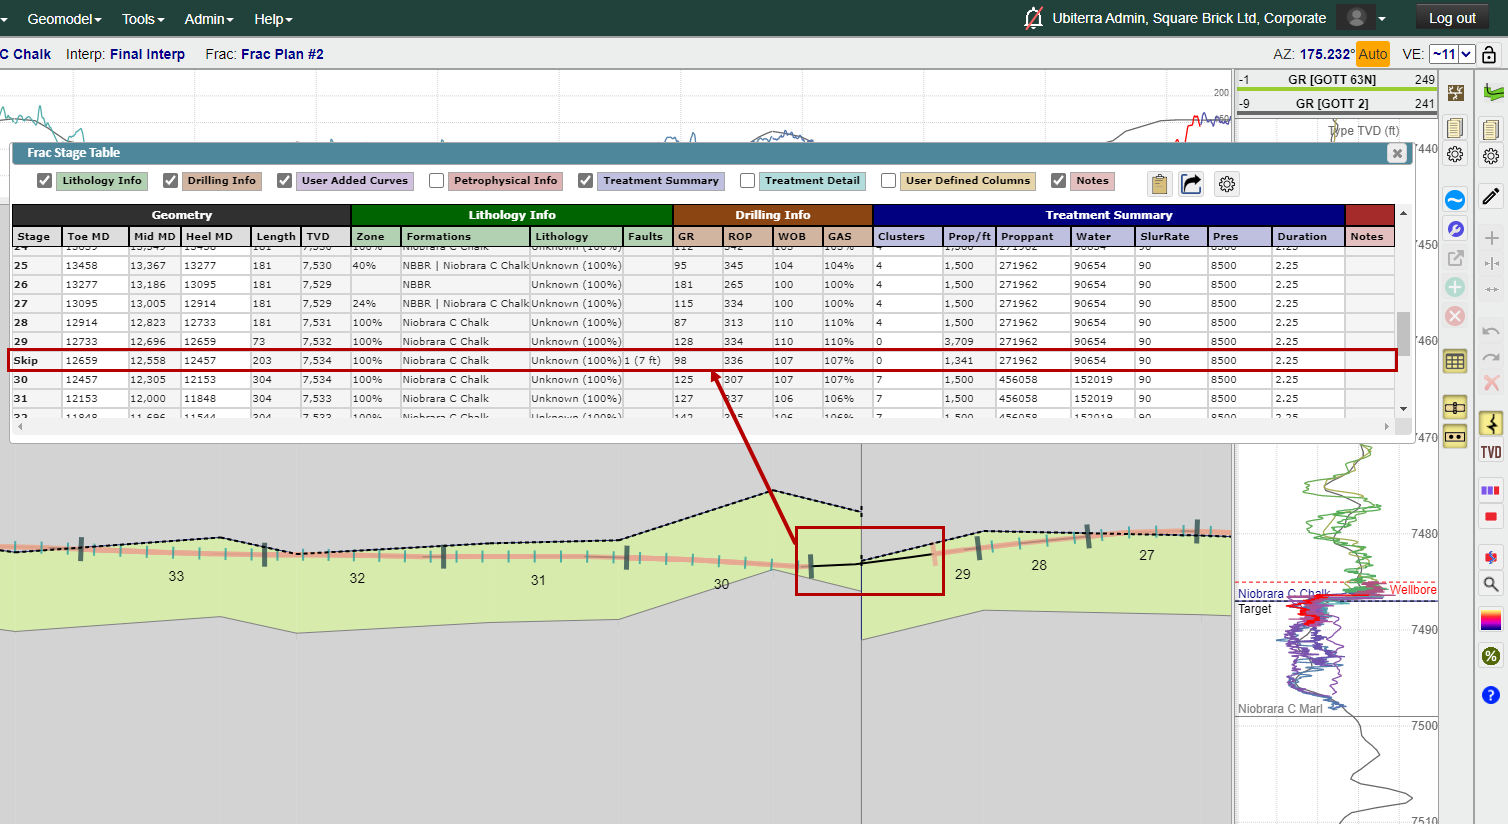
Skip Stage checkbox: Marks this stage as a Skipped section
Note: When you mark a stage as "Skipped" the Stage Highlighting will be removed. This Segment will be skipped in the stage numbering, and the Stage number will be changed to "Skip" in the Stage Table and any Frac export. The data for that skipped stage will be retained, and the stage can be un-skipped at any time.
Notes Input: Add notes about this stage. These notes will be shown in the Stage Table in the Notes Column
Cluster Design section: Redesign the Perf Clusters for this Stage
Treatment Design Section: Redesign the Treatment Parameters for this Stage
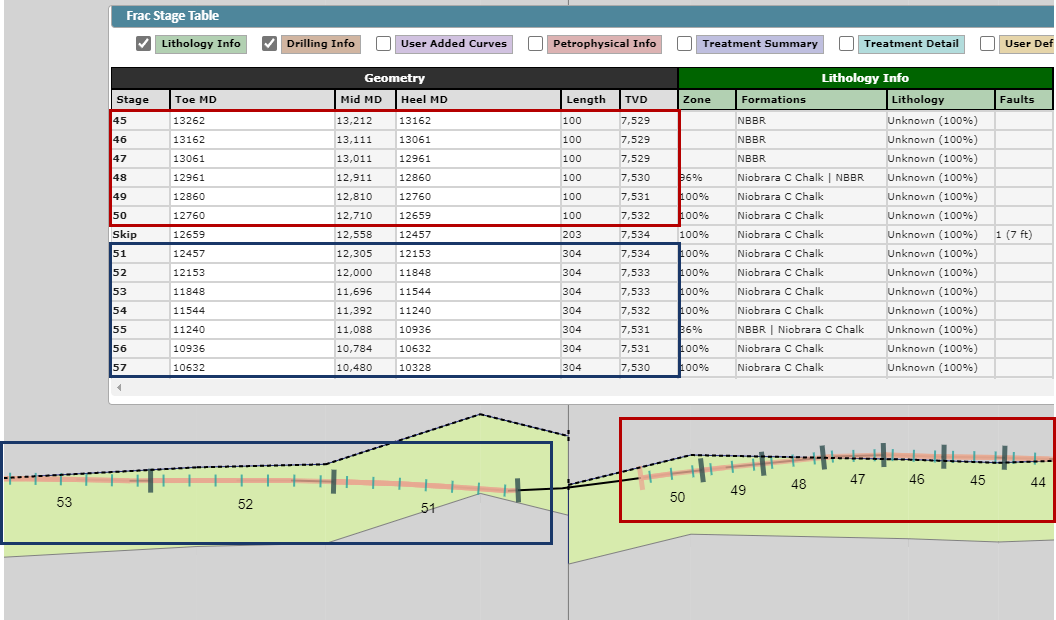
Example #1:
In the example below, the initial design had a stage length of 100'. But a problematic fault was encountered after Stage #50, so this section of the Wellbore has been skipped. It was decided that the remainder of the Wellbore would be completed with 300' Stages, so Stage #51 heelward was redesigned using a stage length of 300'.