
Creating a new Target Line
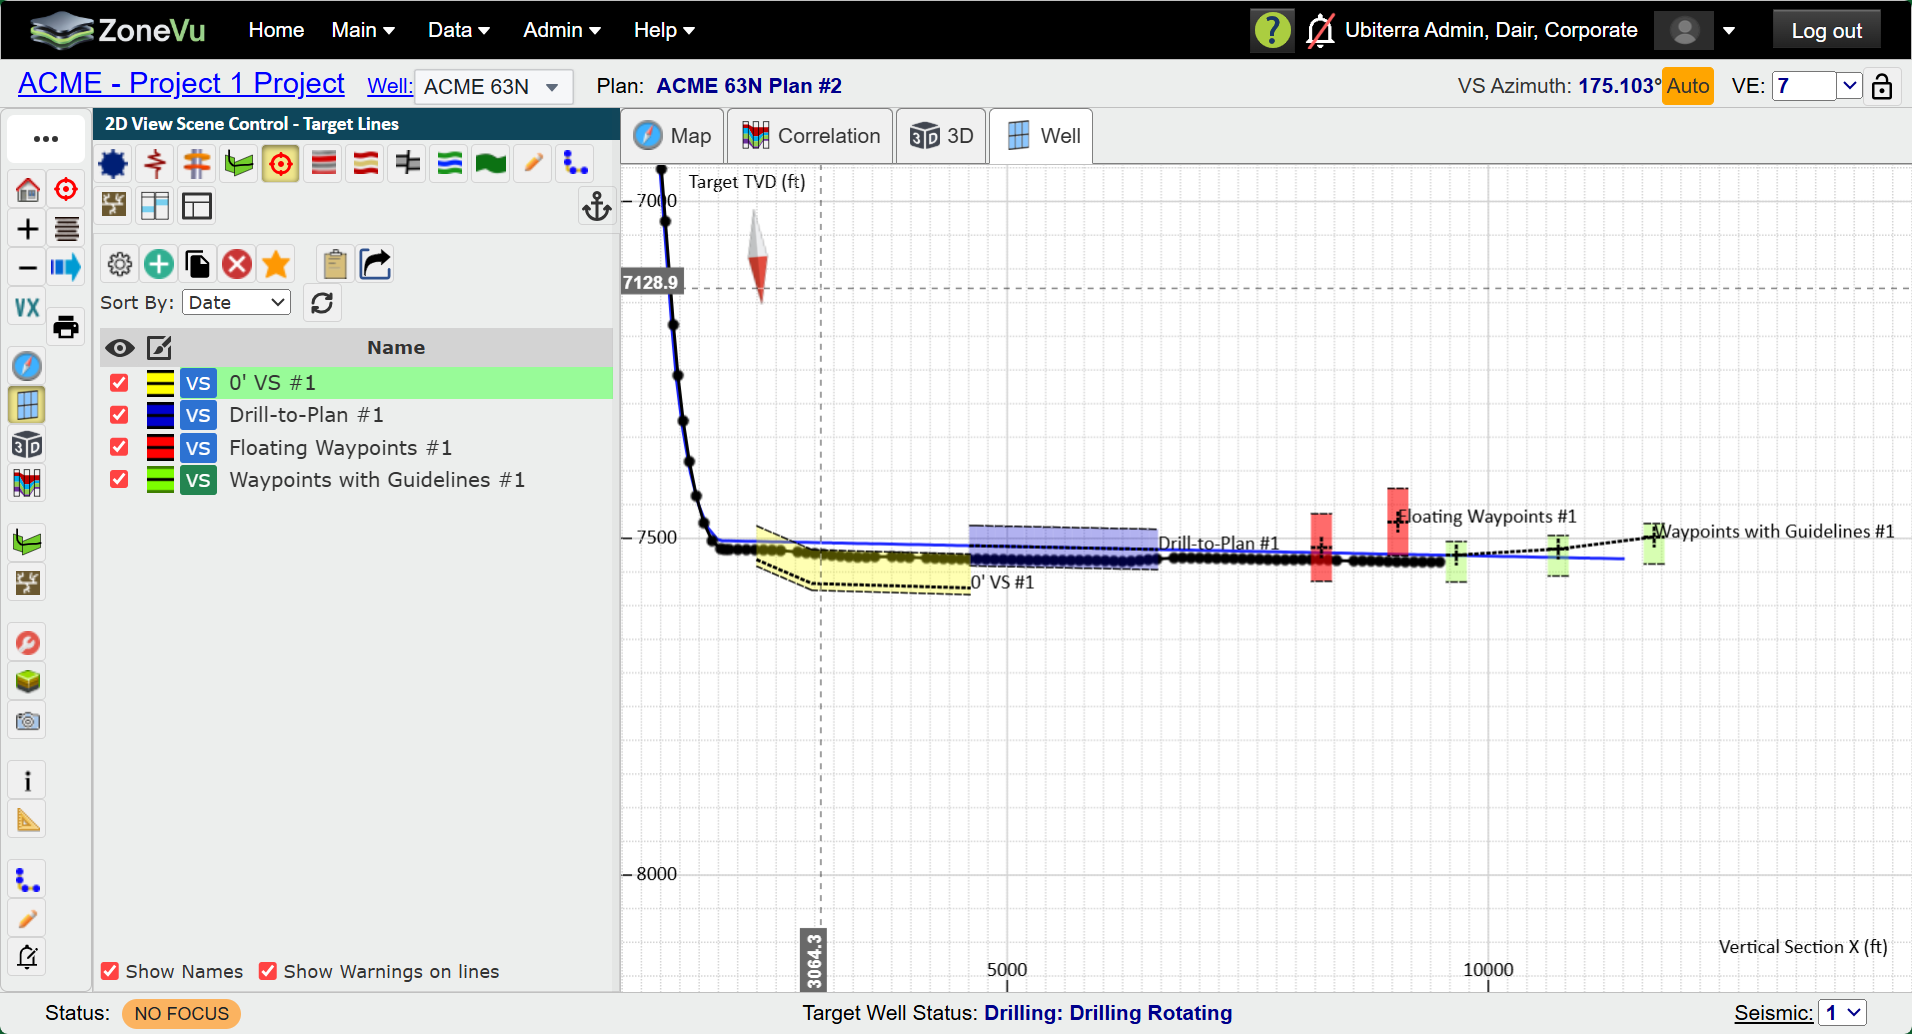
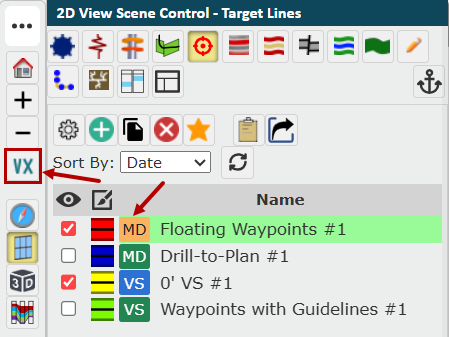
Click on the 'Target Line' button in the Main Button Tree or at the top of 'Scene Control'. This will open the 'Target Line' tab of 'Scene Control'.
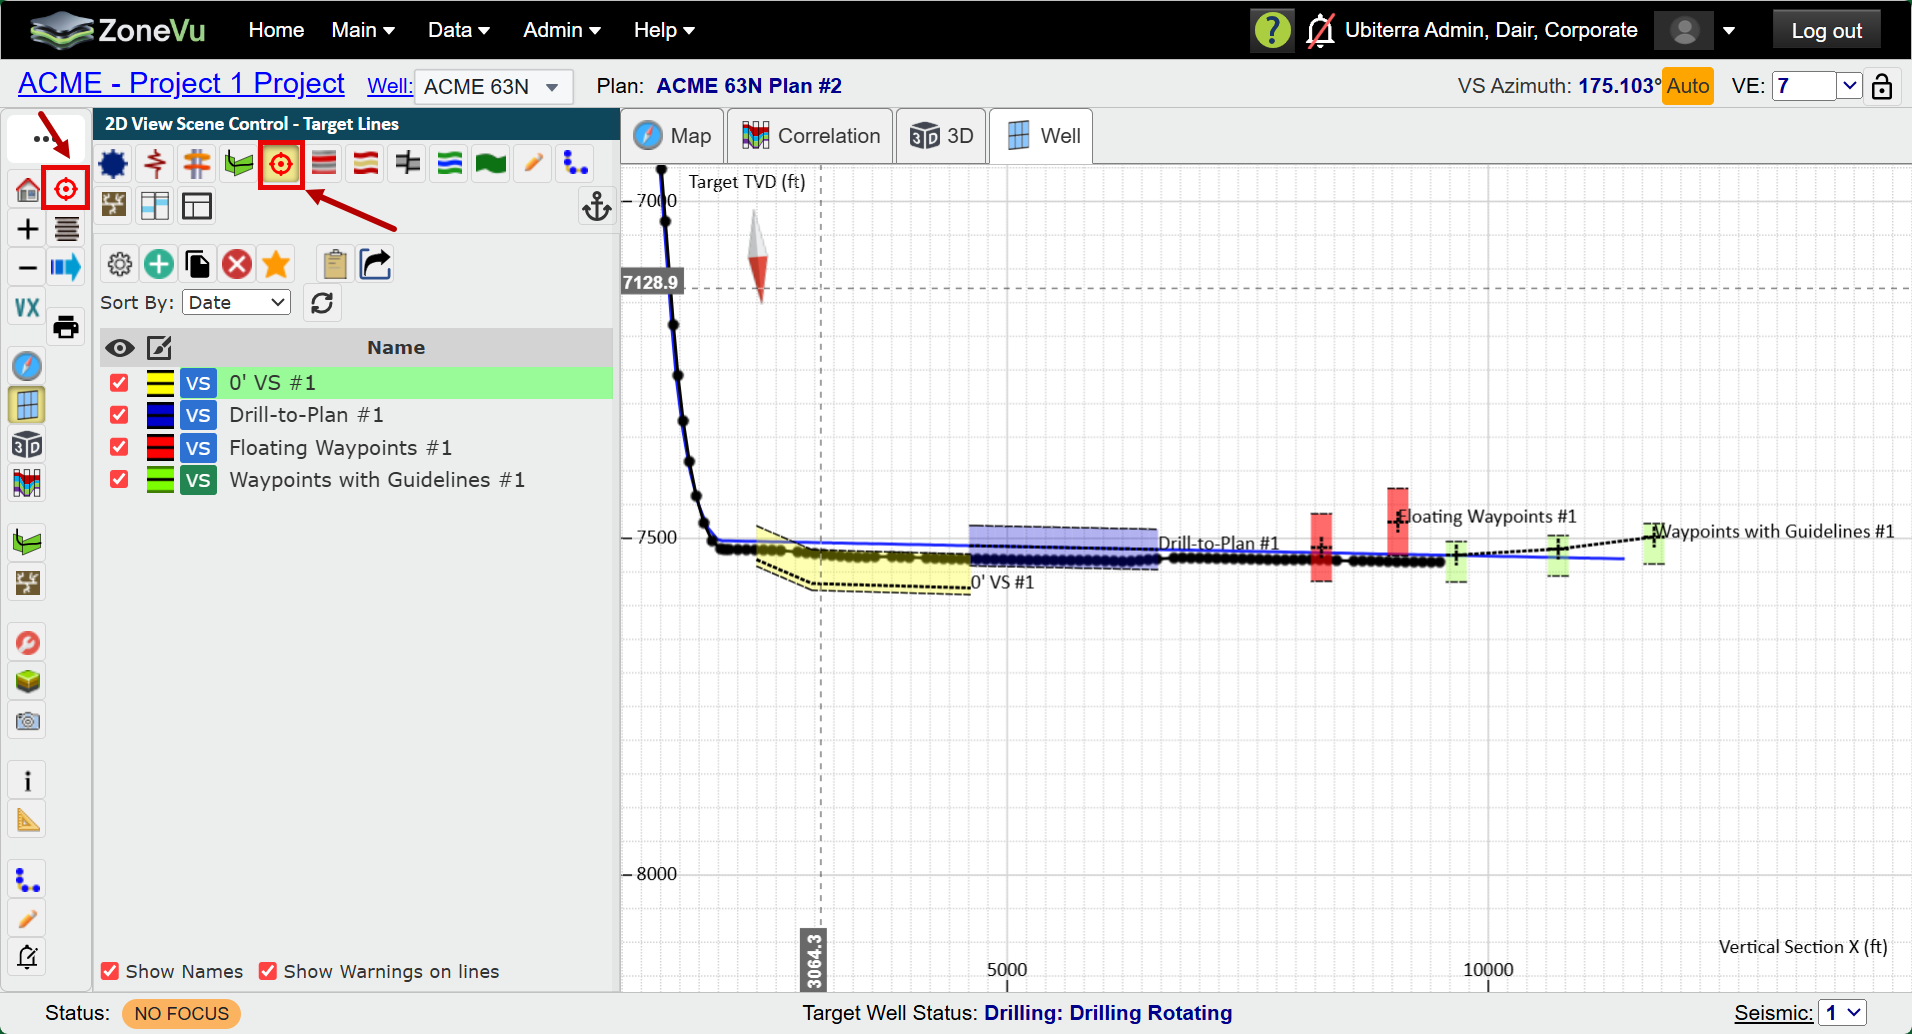
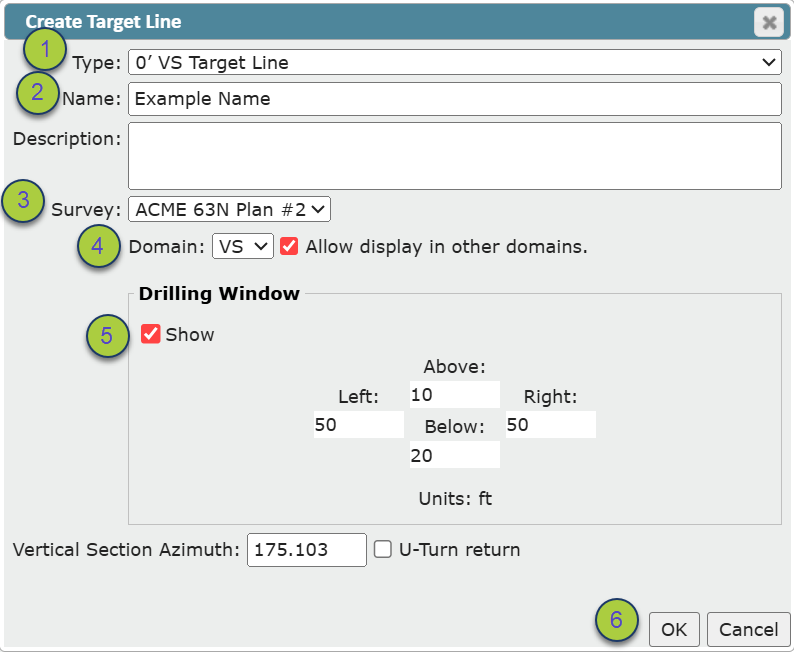
Click the 'Create' button to open the 'Create Target Line' dialog.
Select a target line Type.
Give the target line a name.
Select the survey you would like to have associated with the target line.
Example: if you are creating a Drill-to-plan target line, make sure you are selecting your primary well plan).
Choose a Domain in which to draw the target line; Vertical Section or Measured Depth.
Choose whether or not to show a drilling window with designated size in 4 directions.
Press OK to open the 'Target Line Settings' dialog where you will draw the target line.
Domain Indication: There is a 'Domian' indicator that appears next to the target line name in 'Scene Control'. It will indicate which domain the target line was drawn in, 'VS' for 'Vertical Section' domain and 'MD' for 'Measured Depth' domain. It will be Blue if it is only visible in the domain it was drawn in. It will be Green if it is visible in both domains. It will be Orange if the target line is not allowed to be visible in the domain you are currently in.
Target line Display Domains: If you click the ‘Allow display in other domains’ check box, you will be able to display the target line in the domain not used to create it.
Note: Displaying a Target Line in the other domain may result is warping or shifting of the Target Line.
Target Line VS Azimuth: The Vertical Section Azimuth will default to the that of the well. It can be edited here.
Note: If the VS Azimuth of the Target Lines does not match the Well, the VS calculations will differ. It's recommended that you always use the same VS Azimuth as the Rig/MWD Hand
Target Lines for U-turn wells: Click on the U-turn return option for proper dip calculation of the return section of a U-turn well.
Drawing and Editing a Target Line
Once in the 'Target Line Settings' dialog, there are two ways to add control points to your target line.
Edit Control Points in Well Section: Use the ‘Edit’ button to click along the Cross-Section to add Target Line control points.
Add New Segment Row to Table: Use the ‘Create’ button to add a new row and manually input control point information into the 'Target Line Settings' dialog table.
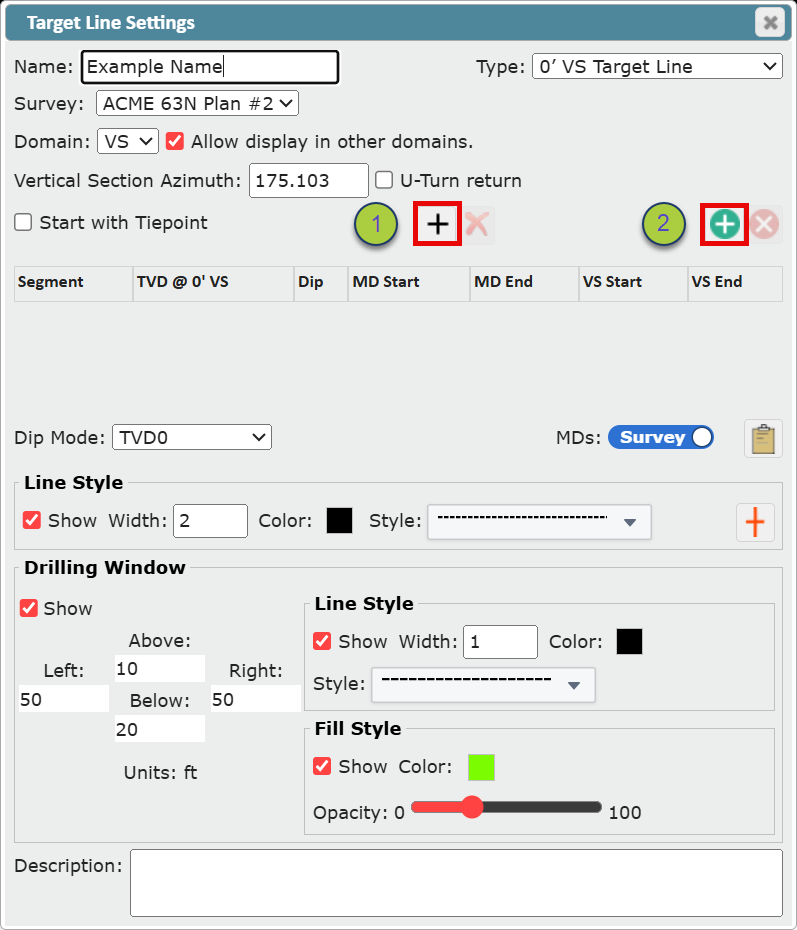
Tiepoints: Checking on the 'Start with Tiepoint’ check box. will allow the first target line control point to be connected to a survey station using the 'Select Survey Station' button that appears next to the 'Add' button in the center of the 'Target Line Settings' dialog, when active.

Editing Target Line Style
You can edit the style of the target line and drilling window from the 'Target Line Settings' dialog. From the 'Target Line' tab of 'Scene Control', open the 'Target Line Settings' dialog by highlighting a target line in the list and clicking the 'Settings' button, or by clicking on the color and line stye indicator next to the target line name.
To delete or move/edit Target Line control points using 'Edit Control Points in Well Section'
Open the 'Target Lines Settings' dialog.
Click the 'Edit' button
 to make control point editing active. It is orange when active.
Click on a control point in the 2D Viewer to highlight it pink and delete it with the 'Delete' button

To delete or move/edit Target line control points using 'Add New Segment Row to Table'
To delete row, click on the row number to highlight it, then click the 'Delete' button

To edit a row click and edit directly in the table of the 'Target Line Settings' dialog.
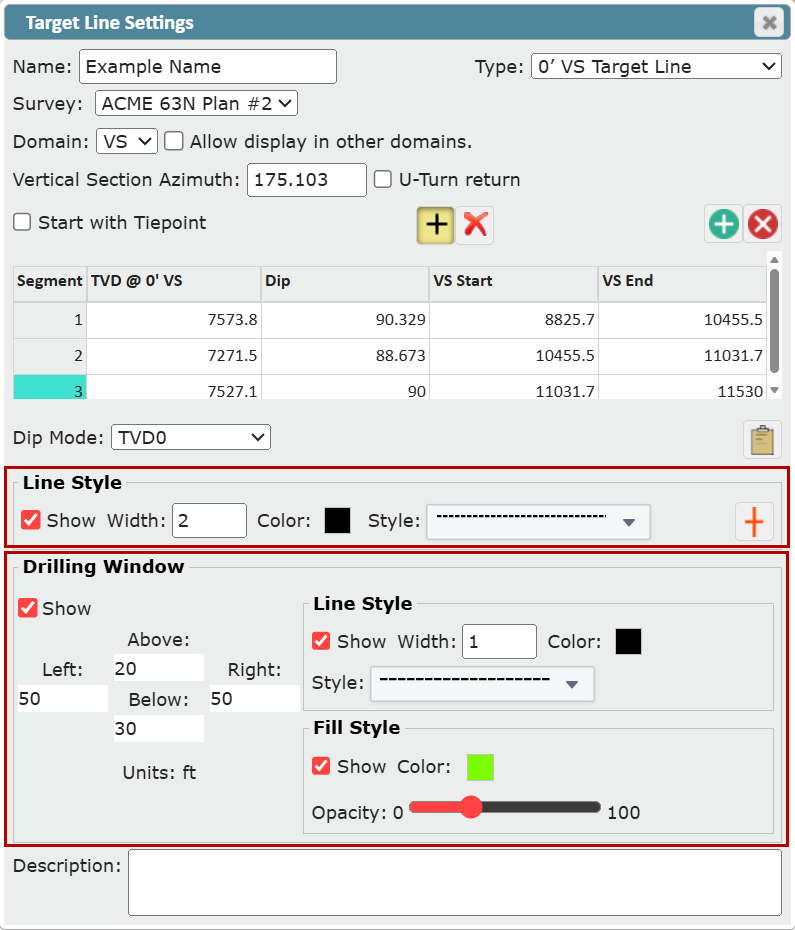
Target Line Dip Mode: Dip Mode allows you to choose which TVD will be held constant when changes to the dip column are applied.
Target Line MD options: MDs can be toggled back and forth from Survey to View. Survey shows the original MDs on the selected survey. View shows the vertical section MDs.
Target line Style: Use the 'Line Style' section to change the line width, color and style of your target line.
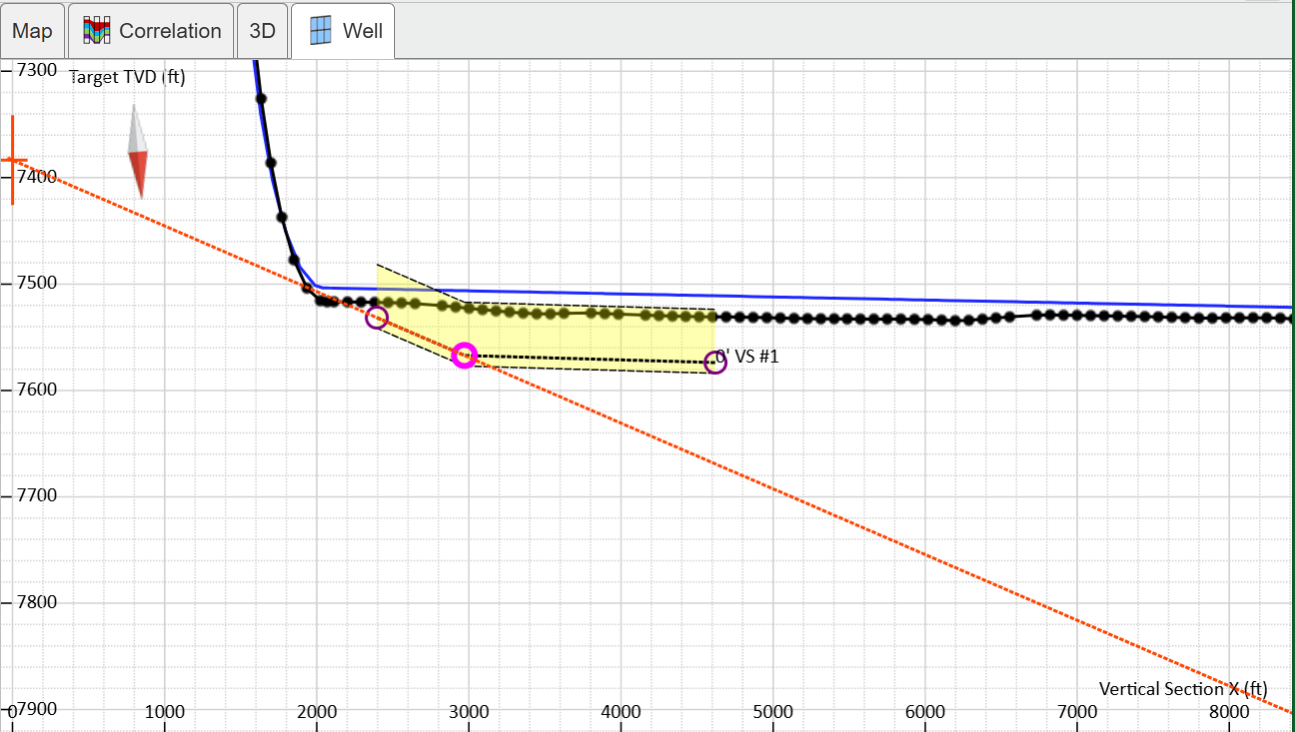
Drilling Window: Use the 'Drilling Window' section to change the line width, color and style of your drilling window, line as well as fill color and opacity, and drilling window size.
Center Line Graticule: In the 'Line Style' section of the 'Target Line Settings' dialog the center line graticule can be turned on for '0' VS' target lines by clicking the 'Center Line Graticule' button. This will project a red-dotted center line graticule off any selected target line control point.

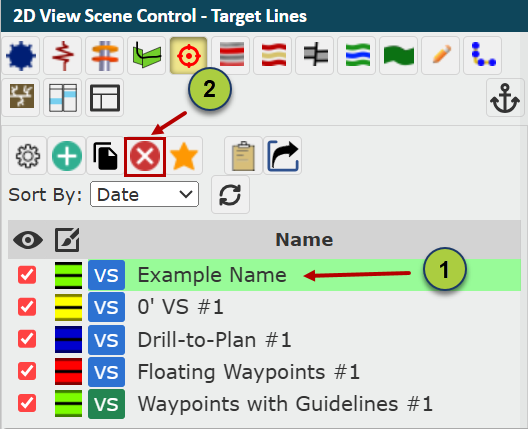
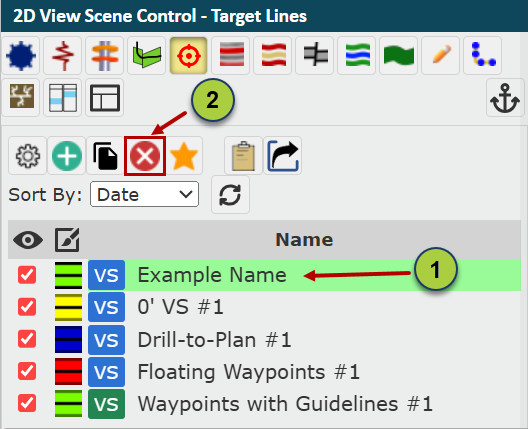
Deleting a Target Line
From the 'Target Line' tab of 'Scene Control', click on the target line you would Like to delete.
Click the 'Delete' button located at the top of the 'Target Line Name' list to delete it.
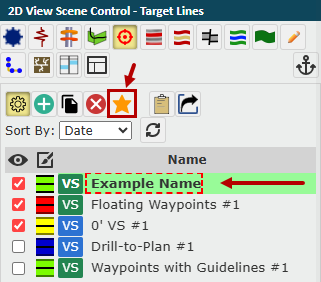
Staring a Target Line
You can Star a target line and make it active by clicking on the 'Star' button at the top of the 'Target Line Name' list. This makes the starred target line that active one. The active target line will be bolded and have a red-dotted box around it.
Highlight the target line to export in the 'Target Line Name' list.
Click the 'Star' button make this target line your primary.
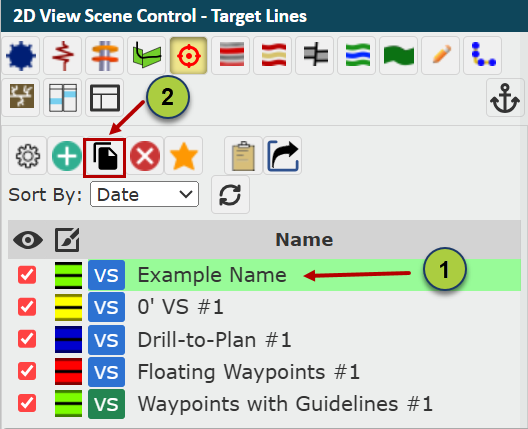
Copying a Target Line
You can make a copy of a target line once it had been created.
Highlight the target line to export in the 'Target Line Name' list.
Click the 'Copy' button at the top of the 'Target Line Name' list
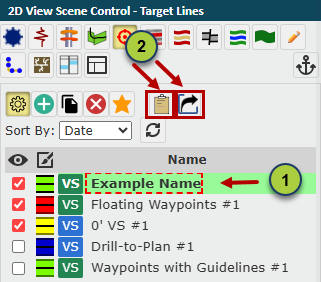
Exporting a Target Line
There are two ways to extract target line information from ZoneVu; 1) use the 'Copy to Clipboard' button to copy and paste target line data into another document or 2) use the 'Export' button to generate a Excell workbook for the target line data.
Highlight the target line to export in the 'Target Line Name' list.
Click the 'Copy to Clipboard' button to paste data elsewhere or click the 'Export' button to download a workbook.
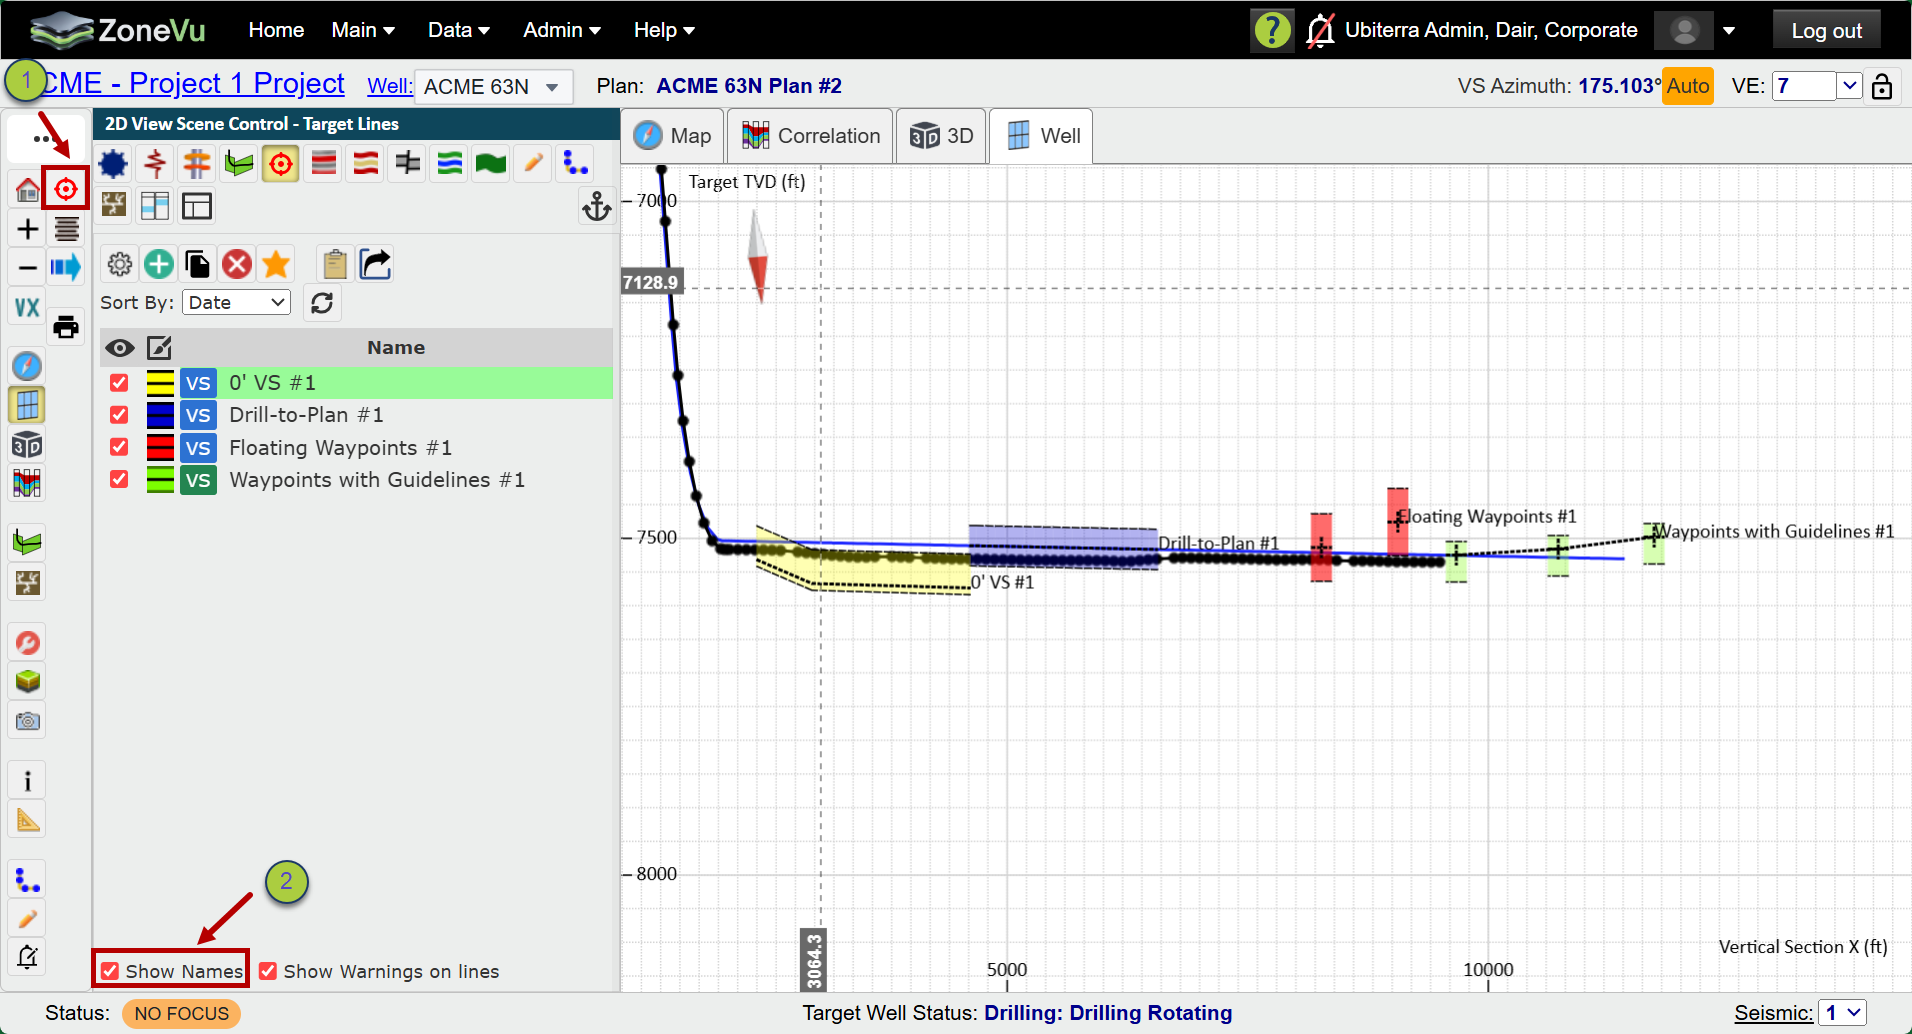
Showing Names of Target Lines
You can show the names of target lines in the Cross-Section. Target line names will display at the toe-ward end of the target line.
Go to the 'Target Line' tab of 'Scene Control'.
Check on the 'Show Names' check box at the bottom of that tab.
Show Warnings on lines: There is a check box on the 'Target Line' tab of 'Scene Control' that will display warnings on target lines. This will only every be used for very old versions of target lines.