ZoneVu uses shapefiles to create Layers, and these layers can then be displayed in the Map Viewer or 3D Viewer. Layers are created from Polygons, Polylines, or Points. Layers can consist of 1 or more Features. Features are either a single Polygon, Polyline, or Point. Each Feature has its own set of properties. Feature Properties can be basic information (Name, Object Type, Color,...) to more advanced information (Land Owner, Pad Build Date, Mineral Owner Percentage,...). When in the Layers Management tab, you can view and edit these Feature Properties.
Supported File Types:
GeoJSON: More about GeoJson Files
.geojson - JavaScript file that contains the location and properties (Name/Values Pairs) of a geographic data set. All data is in WGS1984 and in decimal degrees.
Shapefiles: More about Shapefiles
Note: Three files (.shp, .dbf, & .prj) are required to import a Shapefile
.shp—The main file that stores the feature geometry
.dbf—The dBASE table that stores the attribute information of features
.prj—The file that stores the coordinate system information
.shx—The index file that stores the index of the feature geometry (Not Required)
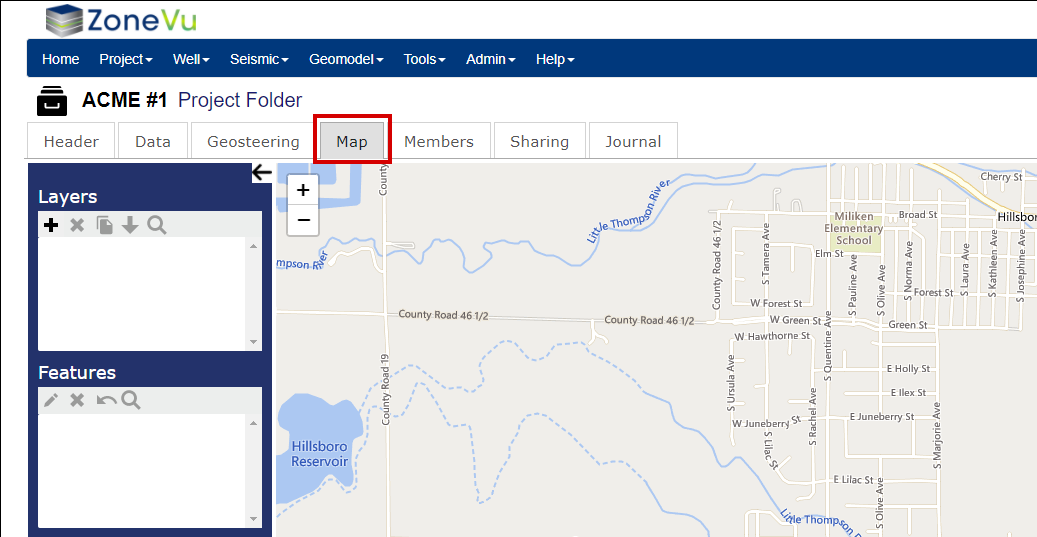
Navigating to the Layer Importer in ZoneVu:
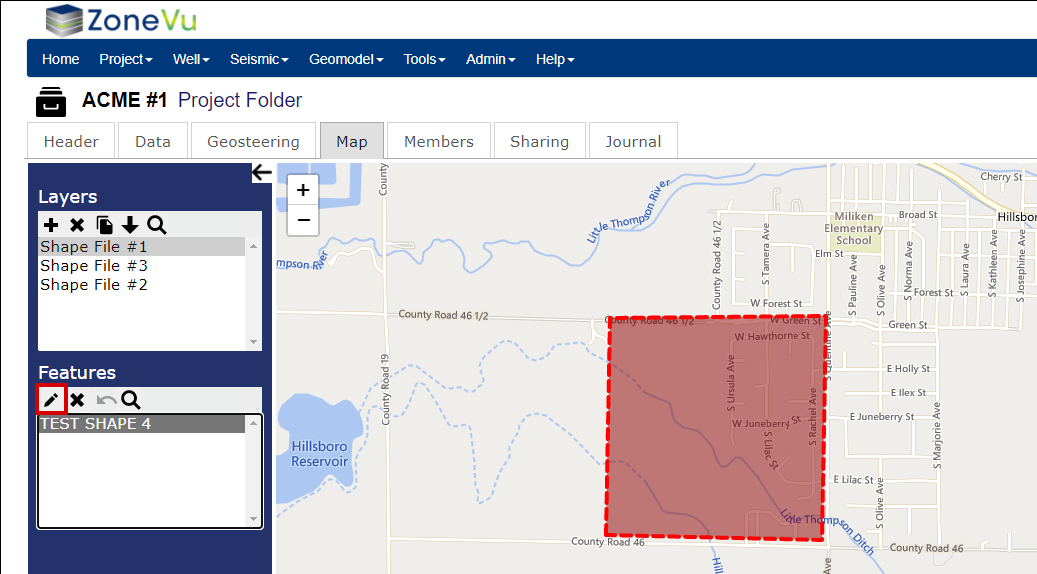
First navigate to the Project Folder, then select the "Map" tab.
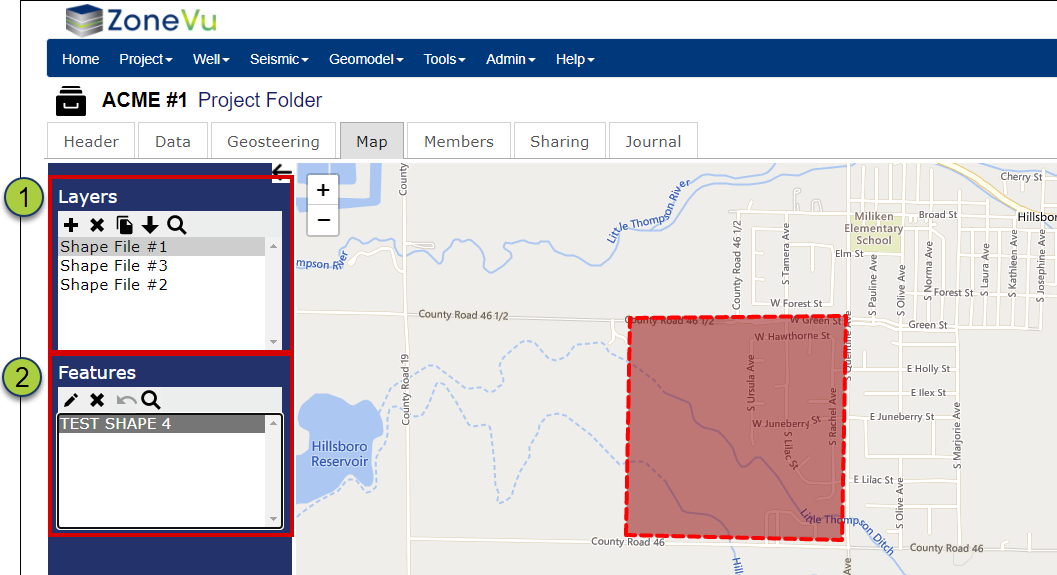
On the Map tab, you will have a base map, similar to what is seen on the Welcome Screen. To the left of the map are the Layer and Feature control boxes, where you will navigate and edit Layers and the associated Features
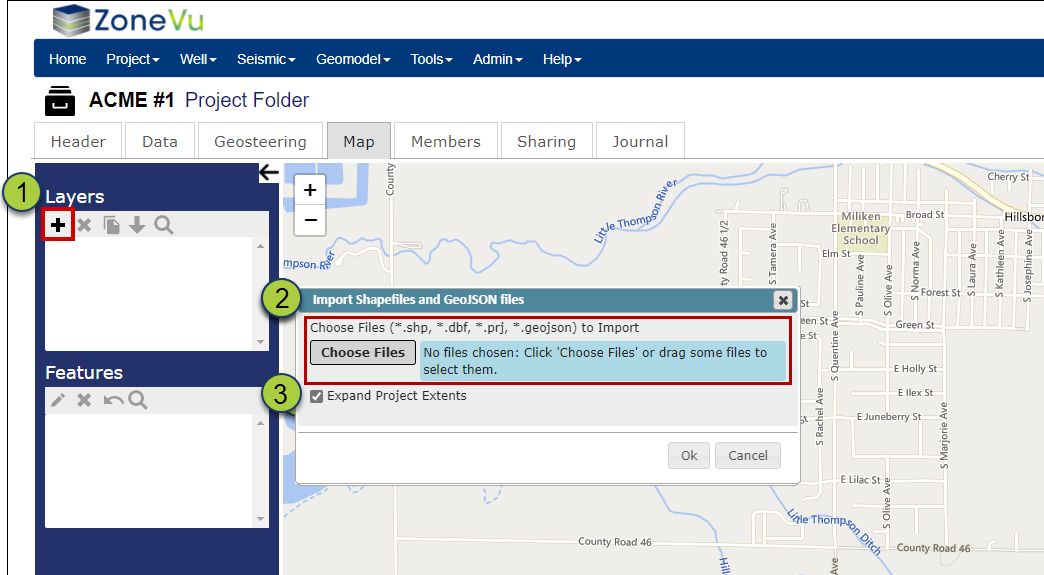
Importing a Shapefile:
Click the "+" to open the Import Shapefile pop-up
Drag and drop the shapefile(s) onto the "Choose Files" button or click the "Choose Files" button to search for the file(s)
ZoneVu supported shapefile formats:
ESRI Shapefile (.shp, .dbf, .prj,...)
GeoJSON (.geojson)
"Expand Project Extents" checkbox: Will update the Projects Extents to include the imported shapefile(s)
This will be checked on by default
Click "Ok" to load the Shapefile(s) and convert them to Layers
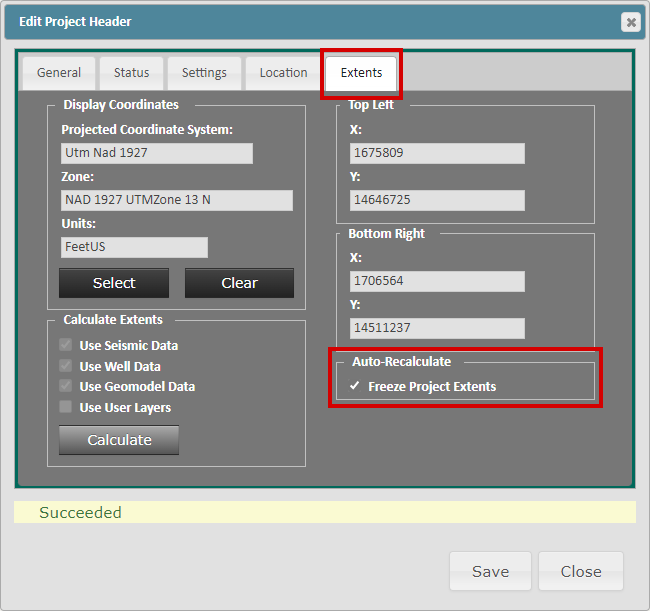
If the "Expand Project Extents" button is greyed out, this indicates that the "Freeze Project Extents" checkbox in the Project Header has been checked on. If you want ZoneVu to auto-adjust the Project Extents to incorporate this new layer file, click the black "Project" button in the upper right corner of your screen to open the Edit Project Header pop-up, select the "Extents" tab and uncheck the "Freeze Project Extents" checkbox in the bottom right corner.
All Layers loaded into the Project will be displayed in the Layers List Box
When you select a Layer in the Layer List, the entire layer will be highlighted with dashed red lines
When a Layer is selected, the Features within the Layer will be listed in the Features List Box
Features are polygons, lines, or points that make up the Layer file
When you select a Feature in the Feature List, that feature will be highlighted on the map with a dashed red line
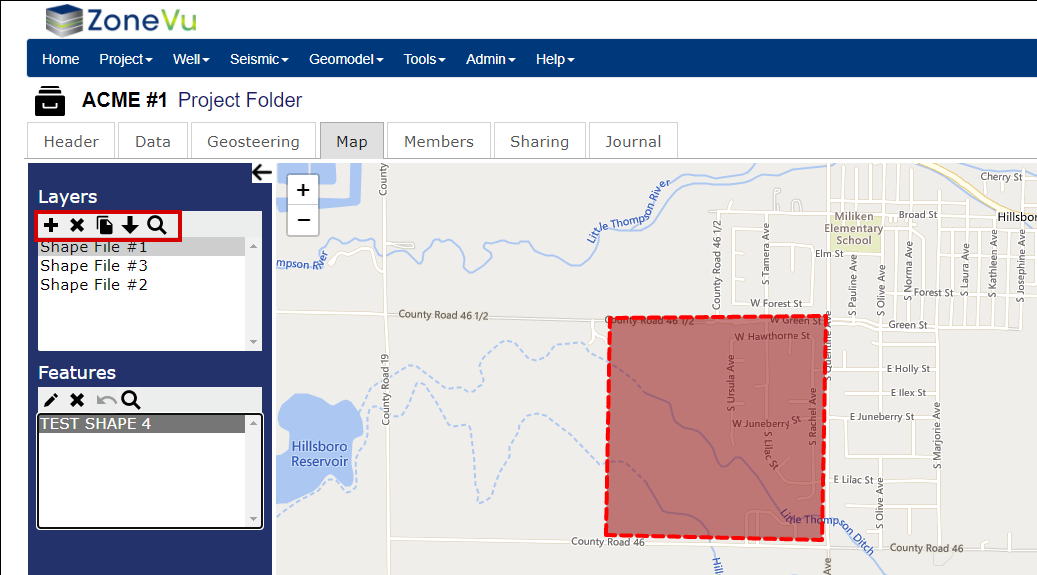
Layer Control Buttons (Left-Right):
"+" button: Opens the Import Shapefile pop-up
"X" button: Deletes the selected Layer(s)
"Copy" button: Makes a copy of the selected Layer(s)
"Export" button: Exports the selected layer as a .geojson file
"Zoom" button: Zooms to the selected Layer(s)
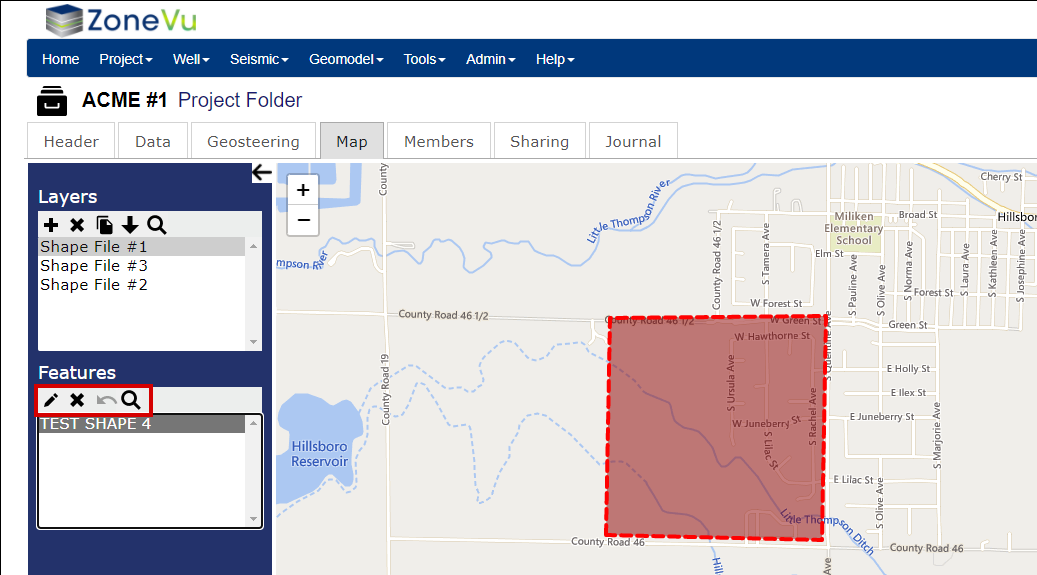
Features Control Buttons (Left-Right):
"Edit" button: Opens the Edit Feature pop-up
"X" button: Deletes the selected Feature(s)
"Delete Undo" button: Undoes the last Feature Delete
"Zoom" button: Zooms to the selected Feature(s)
Editing a Feature:
First, select the Layer that the Feature is contained within, then select the Feature you wish to edit. Finally, click the "Edit Feature" button, this will open the Edit Feature pop-up
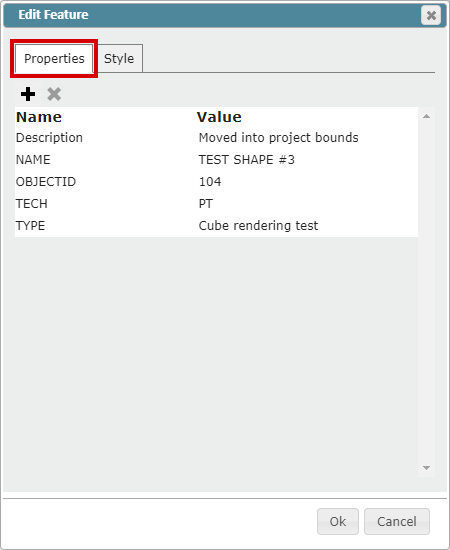
Properties Tab:
The first tab in the Edit Feature pop-up is the "Properties" tab. This tab displays all the Name/Value Properties the selected Feature contains.
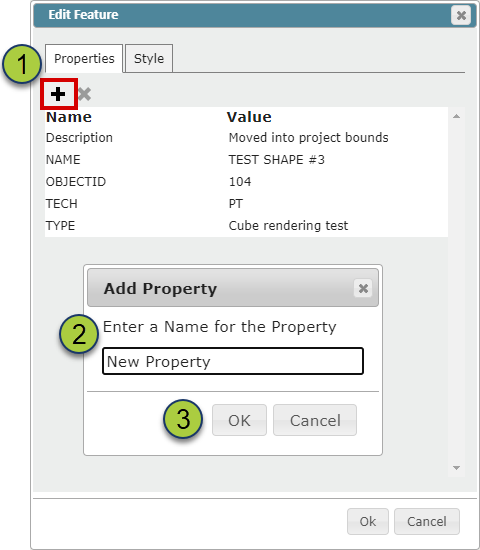
To add a new Name/Value Pair, click the "+" button
In the "Add Property" pop-up enter the desired Property Name
Click "Ok" to add the new Property
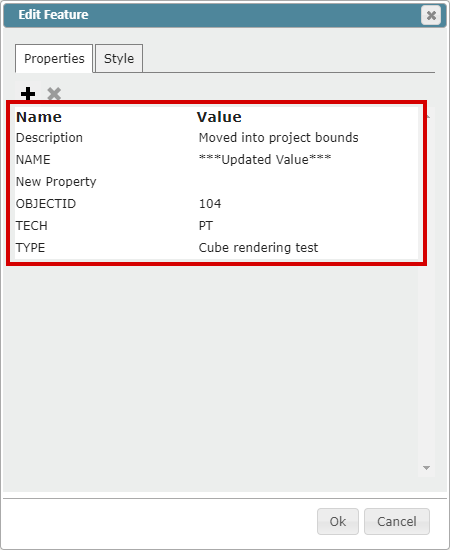
The newly created property will now appear in the Name/Value table
Use the "x" button to delete any selected Name/Value Pairs
You can edit any values by selecting the related cell and typing in the new/updated value
Note: Values can be text, integers, or symbols
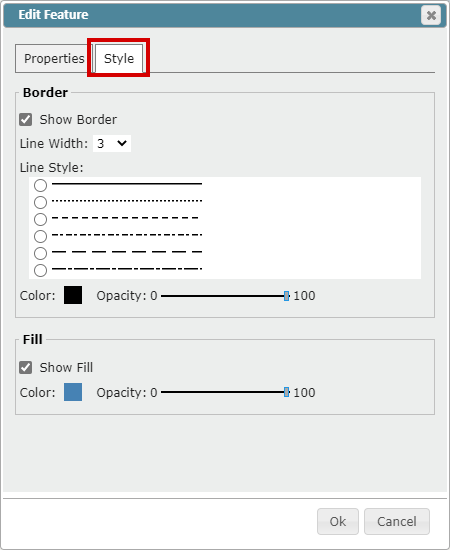
Style Tab:
The "Styles" tab allows you to control the line and fill display properties for the specific Feature
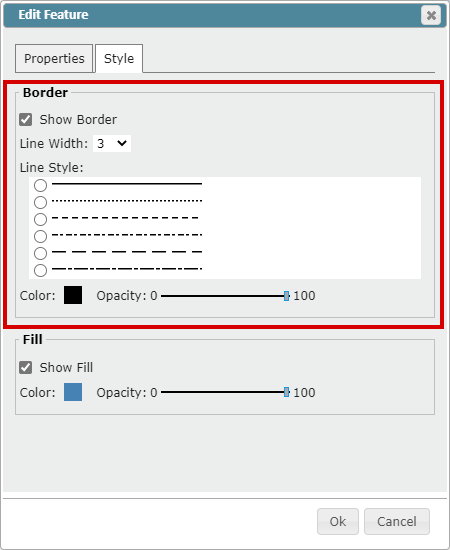
The "Border" box allows you to control the visibility, line width, dashing, color, and opacity of the Feature's border
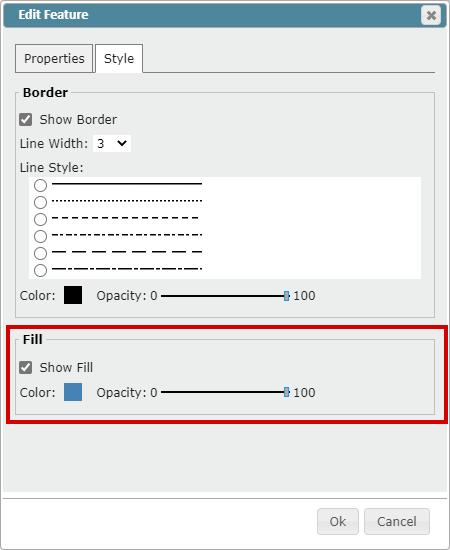
The "Fill" box allows you to control the visibility, color, and opacity of the Feature's fill
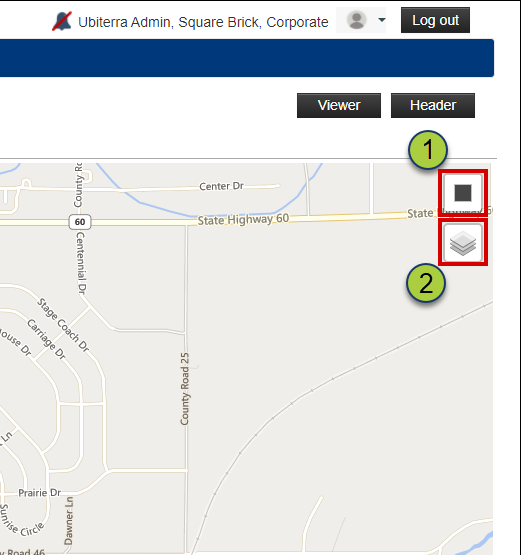
Basemap Controls:
"Project Boundary" button: Select this to re-draw the Project Extents
Note: If you manually draw a new Project Extents, the "Freeze Project Extents" checkbox in the Project Header will be checked on
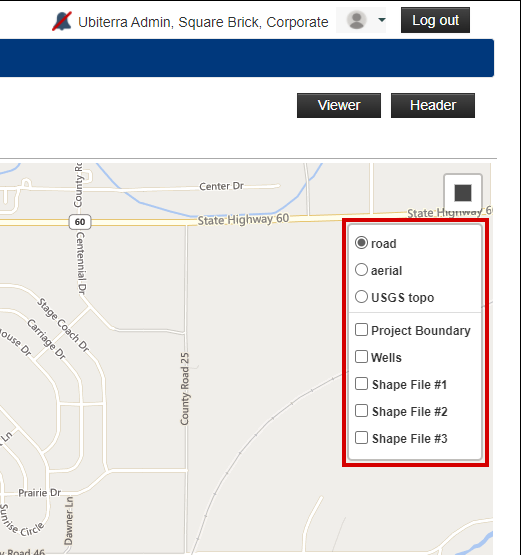
"Map Layer" icon: Allows you to change the Basemap, Project Boundaries, Well Visibility, and display other Layers on the Basemap
Base Maps:
Road: Bing Maps basic map display
Aerial: Bing Maps aerial imagery
USGS Topo: USGS Topo map
"Project Boundary" checkbox: When checked on, all Project Boundaries in the project will be displayed on the map
"Wells" checkbox: When checked on, all wells in the project will be displayed on the map
Layer List: Use the check boxes to turn on other loaded shapefiles