
This article covers how to configure RigStream 2.0 to connect to an existing WITSML well and properly configure incoming drilling data. It walks through selecting the correct WITSML well and wellbore, configuring log curves, and managing Bottom Hole Assemblies (BHAs) to ensure accurate time‑to‑depth data placement.
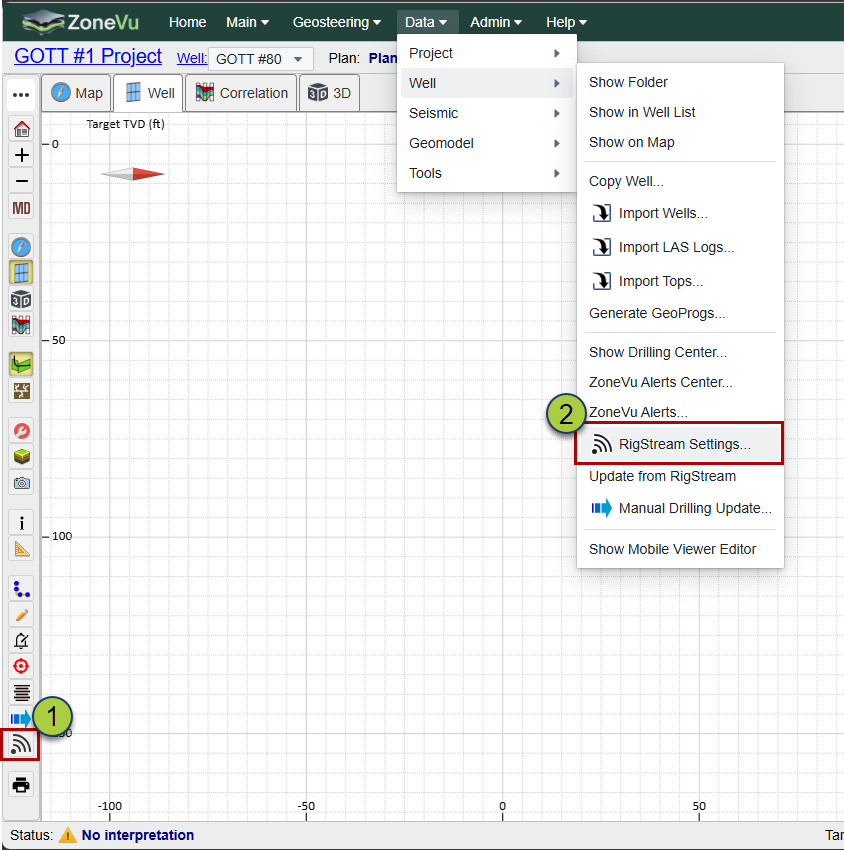
Open the RigStream Settings
To begin configuring RigStream 2.0, open the RigStream Settings dialog. You can access it from either:
The Main Button Tree (1) or
The Data menu (2)
Connect to a Well
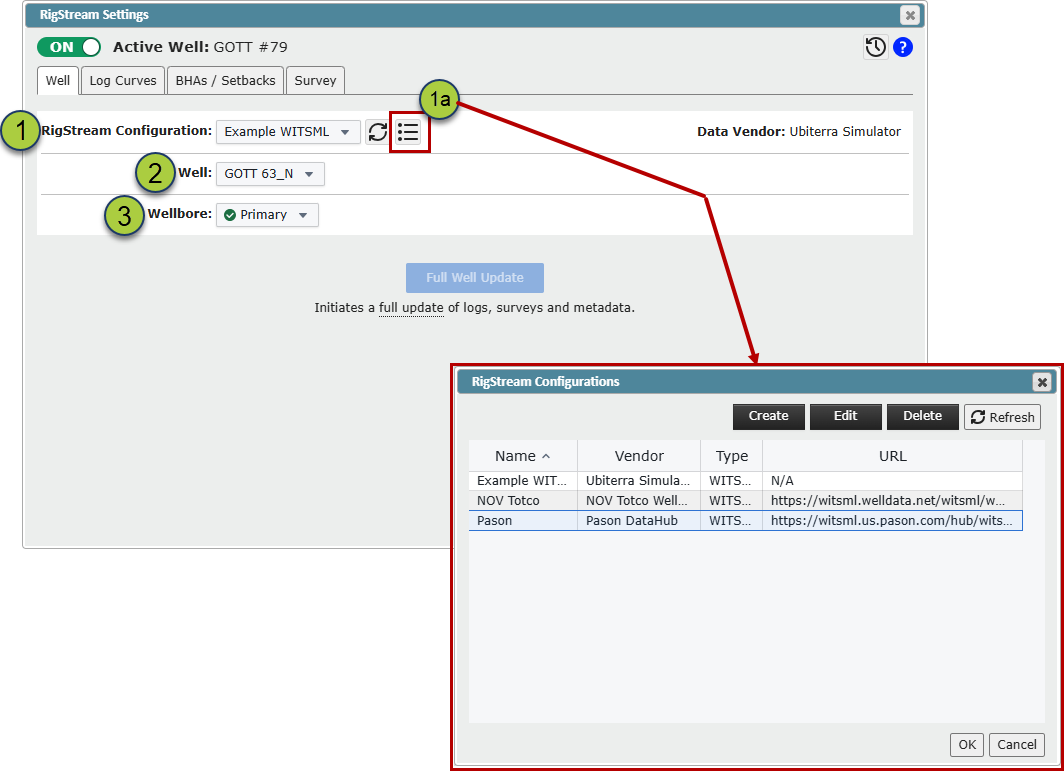
Follow these steps to connect RigStream 2.0 to the correct WITSML well:
Select a WITSML Connection
Use the connection dropdown to select an existing WITSML connection.
(1a)You can open the RigStream Connections list to create or edit connections if needed.
Select a Well
Select a Wellbore
If a wellbore is not automatically selected, choose the correct wellbore from the list.
A green checkmark denotes that RigStream has automatically selected the standard Wellbore.
Note: The Wells tab is now the only location where a 'Full Well Update' can be initiated. It is recommended that Full Well Updates be performed only when necessary, as RigStream may require multiple data request cycles to retrieve the complete dataset due to slow WITSML server transfer rates.
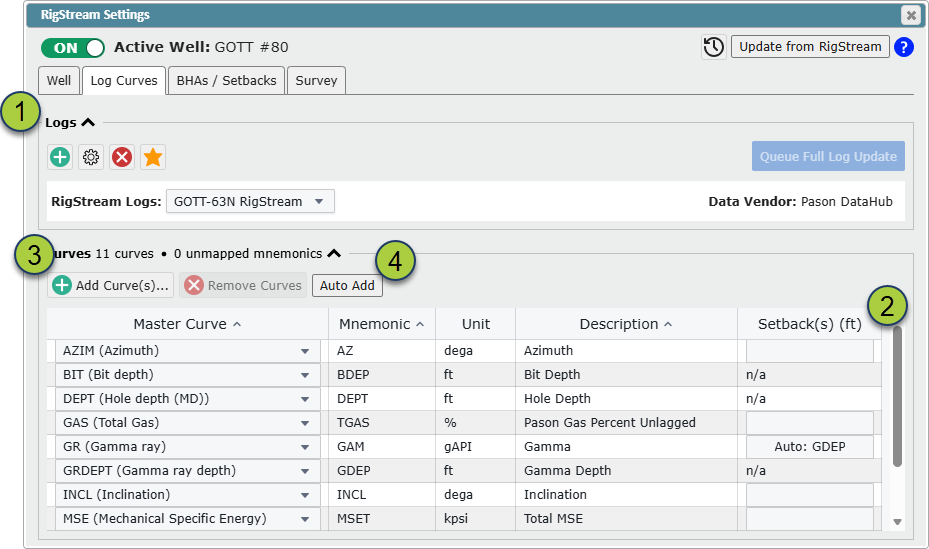
Selecting Log Curves
ZoneVu automatically creates a RigStream log when connecting to a WITSML well.
RigStream Log Creation
A RigStream log is created automatically.
Additional logs can be added if needed, but with the new RigStream BHA Management system, most wells only require one RigStream log per WITSML data vendor.
Curve Configuration
All available curves are listed in the Curves Table.
Use this table to assign Master Mnemonics and Setback values.
Bulk selection using CTRL or Shift is supported when assigning Master Mnemonics.
Bulk Curve Management
Use the Bulk Add and Bulk Remove options to manage curves efficiently.
Auto Add Default Curves
The Auto Add button adds the 11 default curves if they are not already present.
Note: A Full Log Update can be initiated from the Log Curves and BHAs/Setbacks tabs. When triggered, RigStream retrieves the complete log curve dataset from the WITSML provider rather than only the most recent data. Due to slow WITSML server transfer rates, RigStream may require multiple data request cycles to pull the full dataset.
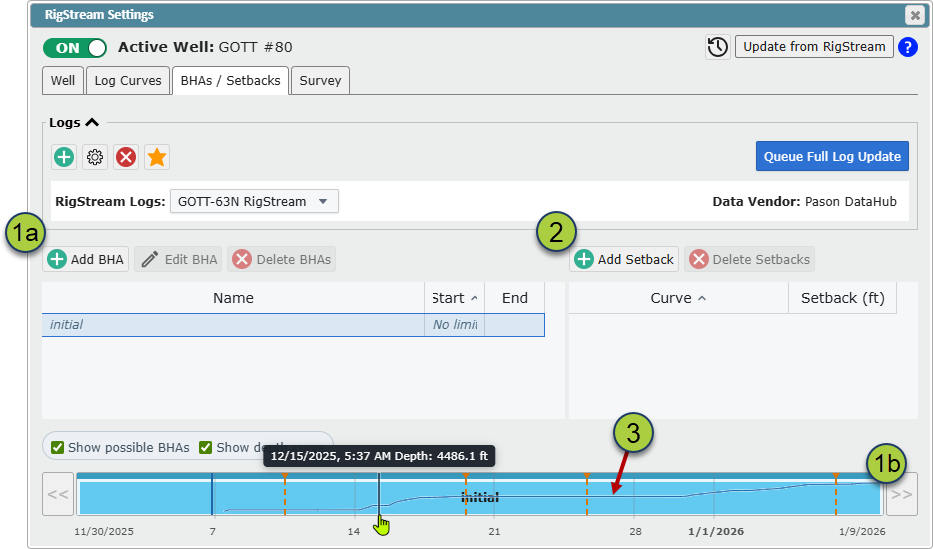
Creating new BHA's and BHA Management
RigStream 2.0 manages and splices log curve data across BHAs, allowing you to maintain a single RigStream log even when BHA changes occur.
When a BHA change introduces a new tool offset, simply add a new BHA under the BHA tab and specify the correct setback distances.
Important Note on Setbacks
WITSML data is collected in time, with depth referenced to bit depth. RigStream requires tool setback distances to correctly shift and place curve data when converting from time to depth. This is especially important for GR data.
Although some vendors provide GR depth curves, it is strongly recommended to manually define BHAs with accurate GR tool setback distances.
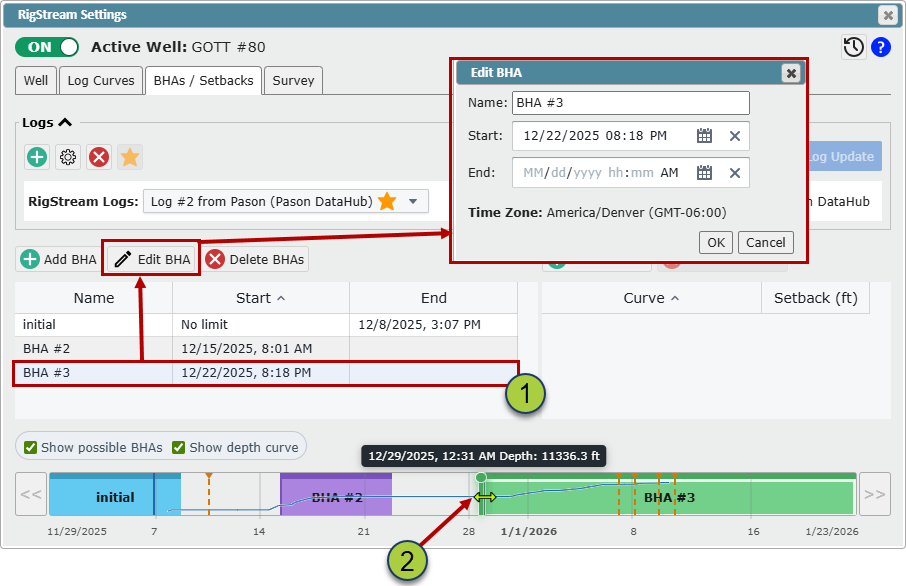
Creating a New BHA
Create the BHA
Option A:
Click Add BHA, enter a name, and manually define start and stop times.
Option B:
Double‑click in the Time Track, name the BHA, and RigStream will automatically populate start and stop times based on your selection.
Add Tool Setbacks
With a BHA selected, click Add Setback.
Select a curve and enter its setback distance.
Once created, this curve will appear on all BHAs.
Curves may have setbacks defined for all, some, or none of the BHAs.
Using the Time Track
When available, RigStream plots the Hole Depth curve in the Time Track.
Depth increases upward in this view.
Flat sections indicate non‑drilling activity (e.g., tripping).
BHA changes should be placed within these flat intervals.
Updating Existing BHAs
You can adjust BHA start and stop times using either method below.
Method 1: BHA Table
Select a BHA in the Time Track
Click Edit BHA
Update the name and/or start and stop times
Click OK to save changes
Method 2: Time Track Editing
Click on a BHA in the Time Track
Hover over either end of the BHA
Click and drag the boundary to adjust timing
Note: If adjacent BHAs are directly connected, adjusting one will automatically update the neighboring BHA. If there is a gap between BHAs, the neighboring BHA will not be modified.
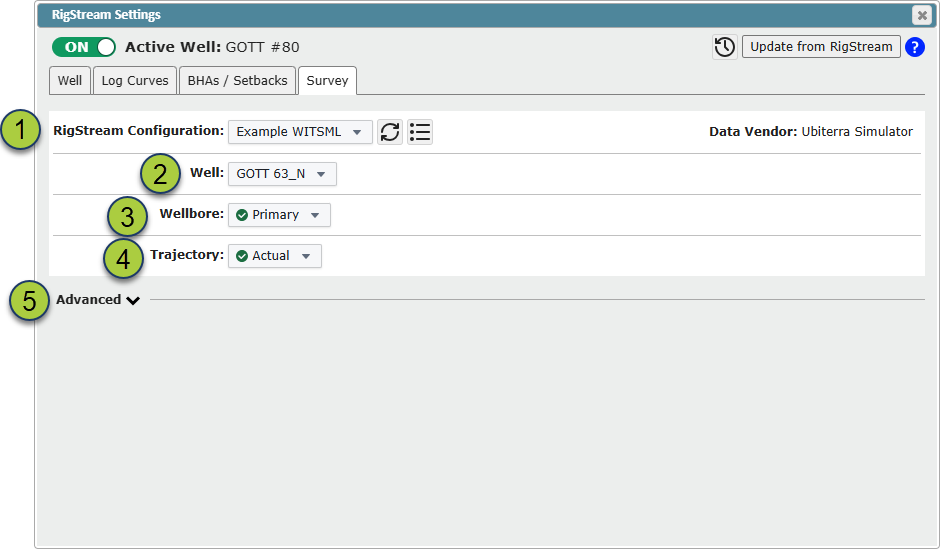
Survey Tab
The Survey tab displays which data sources RigStream uses for survey data.
If changes are required, follow the same steps used to configure the initial WITSML connection:
Select a WITSML Connection
Select a Well
Select the correct Wellbore (if not already selected)
If a wellbore is not automatically selected, choose the correct wellbore from the list.
A green checkmark denotes that RigStream has automatically selected the standard Wellbore.
Update the Trajectory for the WITSML wellbore if necessary
A green checkmark denotes that RigStream has automatically selected the standard Trajectory.
(Optional) Apply a Date/Time filter under the Advanced section (collapsed by default)
Note: Survey data uses the Active log curve as the main filter. You should not apply a Date/Time filter in the Survey tab, unless you have a specific reason
Video Reference
Link to RigStream 2.0 Set Up Video