
Sources for the Geosteering Horizon Data:
There are three data sources ZoneVu can use to create a set of Geosteering Horizons.
1) The Active Type Well:
This is the most common data source. When a Well is set as the Active Type Well, the Top Picks for each formation will be saved on the Geosteering Interpretation and used to define the depths of each related Geosteering Horizon. If the active Type Well is switched, at the block level or the entire interpretation, the Horizons will update to use the new Active Wells' Top data.
2) Active Well:
If a Type Well has not been assigned, or does not have Top data picked on it, ZoneVu will look for Top data on the Active Well to define the Geosteering Horizons. If there are tops found, ZoneVu will use these Tops to define the depths of each related Geosteering Horizon.
Note: If a Type Well is assigned after the Active Well Tops have been used to create the Horizons, the Horizons will update to use the Type Wells Top data, similar to switching the Primary Type Well.
3) Picked Horizons:
You are able to pick Horizons for a Geosteering Horizon through a right-click menu option or by typing in depths in the Horizons tab of the Geosteering Settings dialog.
Note: These Horizons are only saved on the interpretation they were created for, and no Tops will be added to the Active or Type Wells.
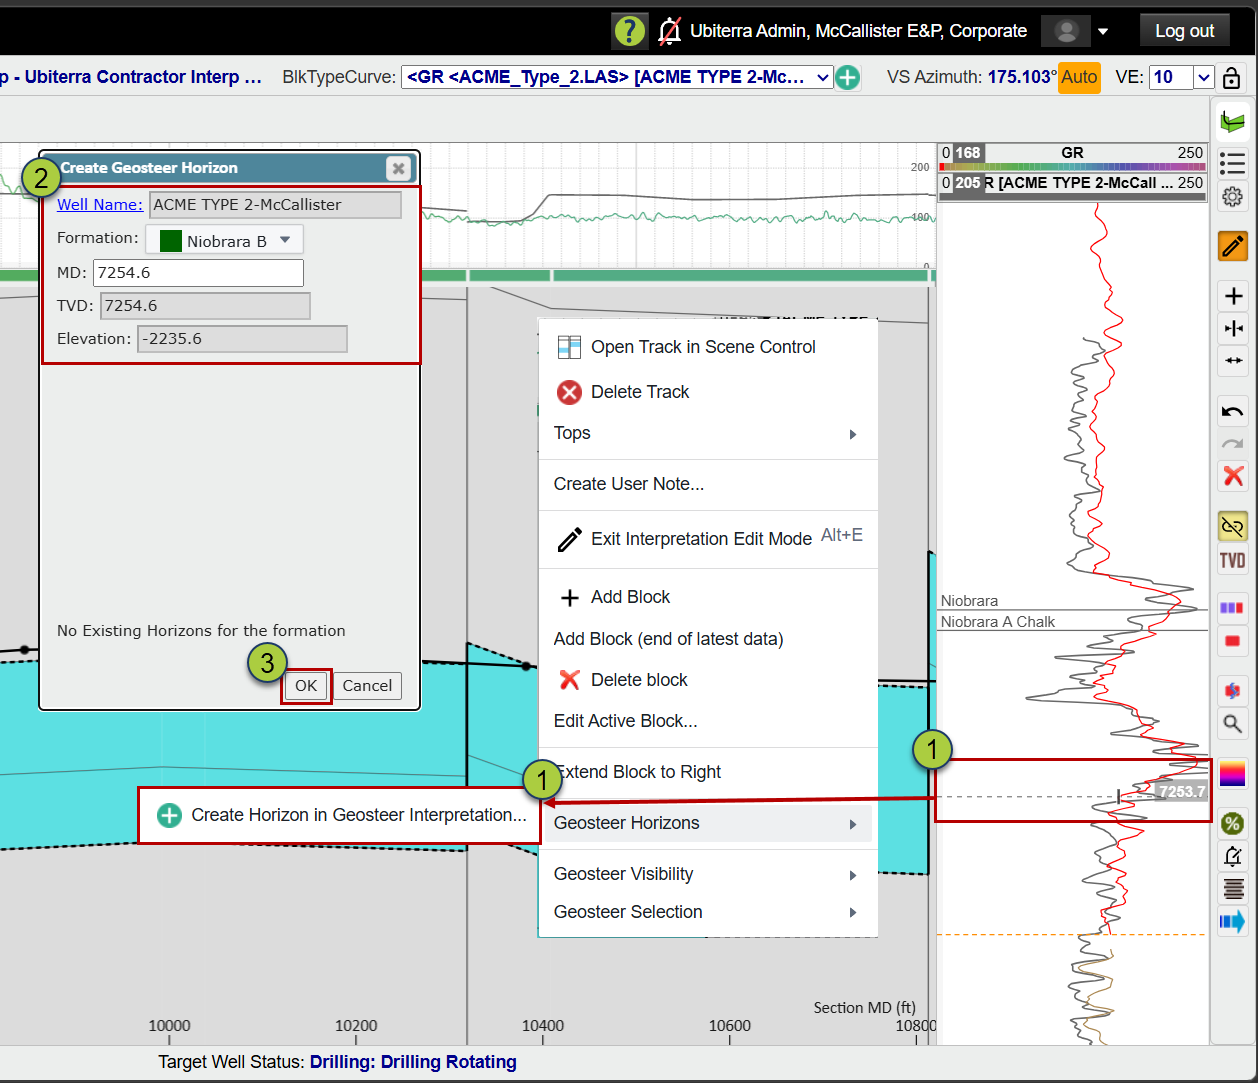
Creating a Geosteering Horizon:
Picking the Horizon in a Vertical Log Track
With the Geosteering Interpretation active, right-click in the Vertical Log Track and select 'Create Horizon in Geosteering Interpretation...'
In the Create Geosteer Horizon dialog, select the correct Formation
Click 'OK' to save the Horizon
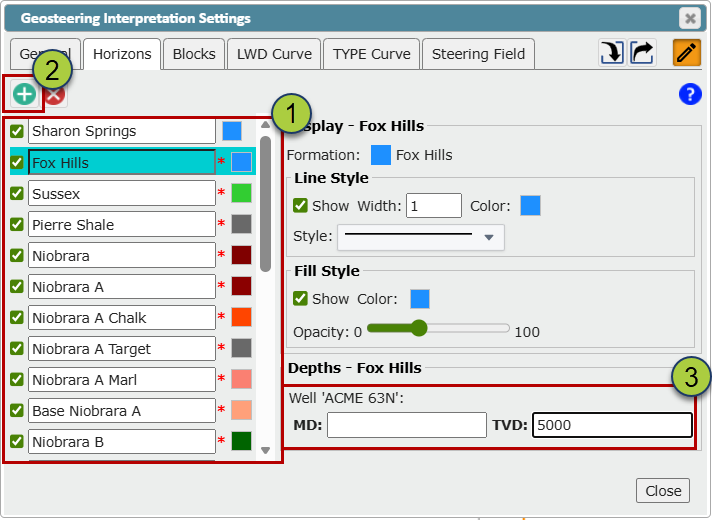
Creating a Horizon in the Geosteering Settings
Navigate to the Horizons tab in the Geosteering Interpretation Settings and select the Horizon you want to create
Note: The red '*' denotes a Horizon that has not been created
You can add any Formations to the list using the 'Add' button
Add the Horizon depth in MD or TVD (Depths are related to Type Well depths). The Horizon will be saved once you click off the depth input
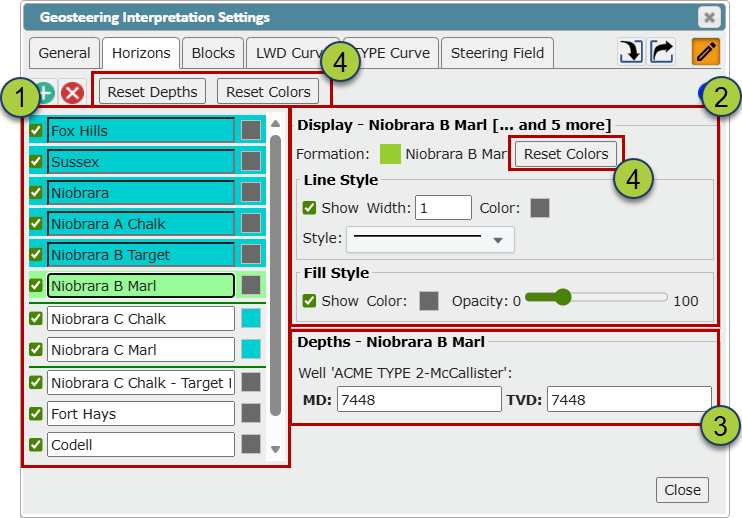
Editing Geosteering Horizons:
Navigate to the Horizons tab in the Geosteering Interpretation Settings and select the Horizons you want to edit (You can multi-select using Shift and CTRL select)
Change the line and fill style using the controls on the right.
Note: if multiple Horizons are selected, these controls will change the style for all selected Horizons
Change the depth of the horizon
Note: This change will only affect the active Geosteering Interpretation and will not affect the related Tops
Use the 'Reset Colors' button to revert the Horizons style to the Strat Column defaults and the 'Reset Depths' to update the Horizons depths to match the source data (Active Well or Type Well)
Note: The 'Revert' buttons in the style section will only update the selected Horizons, and the 'Revert' button above the Horizons List will update every Horizon.
See the Difference between Active Well Tops, Type Well Tops, and Geosteering Horizons article to learn about the different Tops.
See the Picking and Editing Type Well Tops in the 2D Viewer article to learn how to create Tops for a Type Well while in the 2D Viewer
See the Picking Well Tops on the Active Well in the 2D Viewer article to learn how to create Tops for an Active Well while in the 2D Viewer