Below is a detailed walkthrough of how to handle GR tool changes, mid-Well while using RigStream.
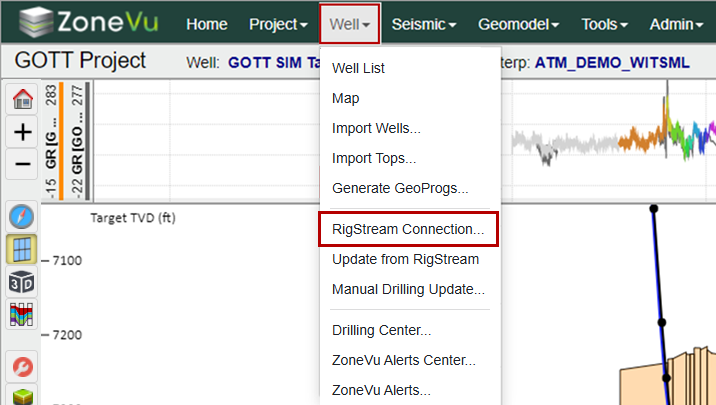
In the Viewer for the associated well, select RigStream Connection from the Well dropdown menu
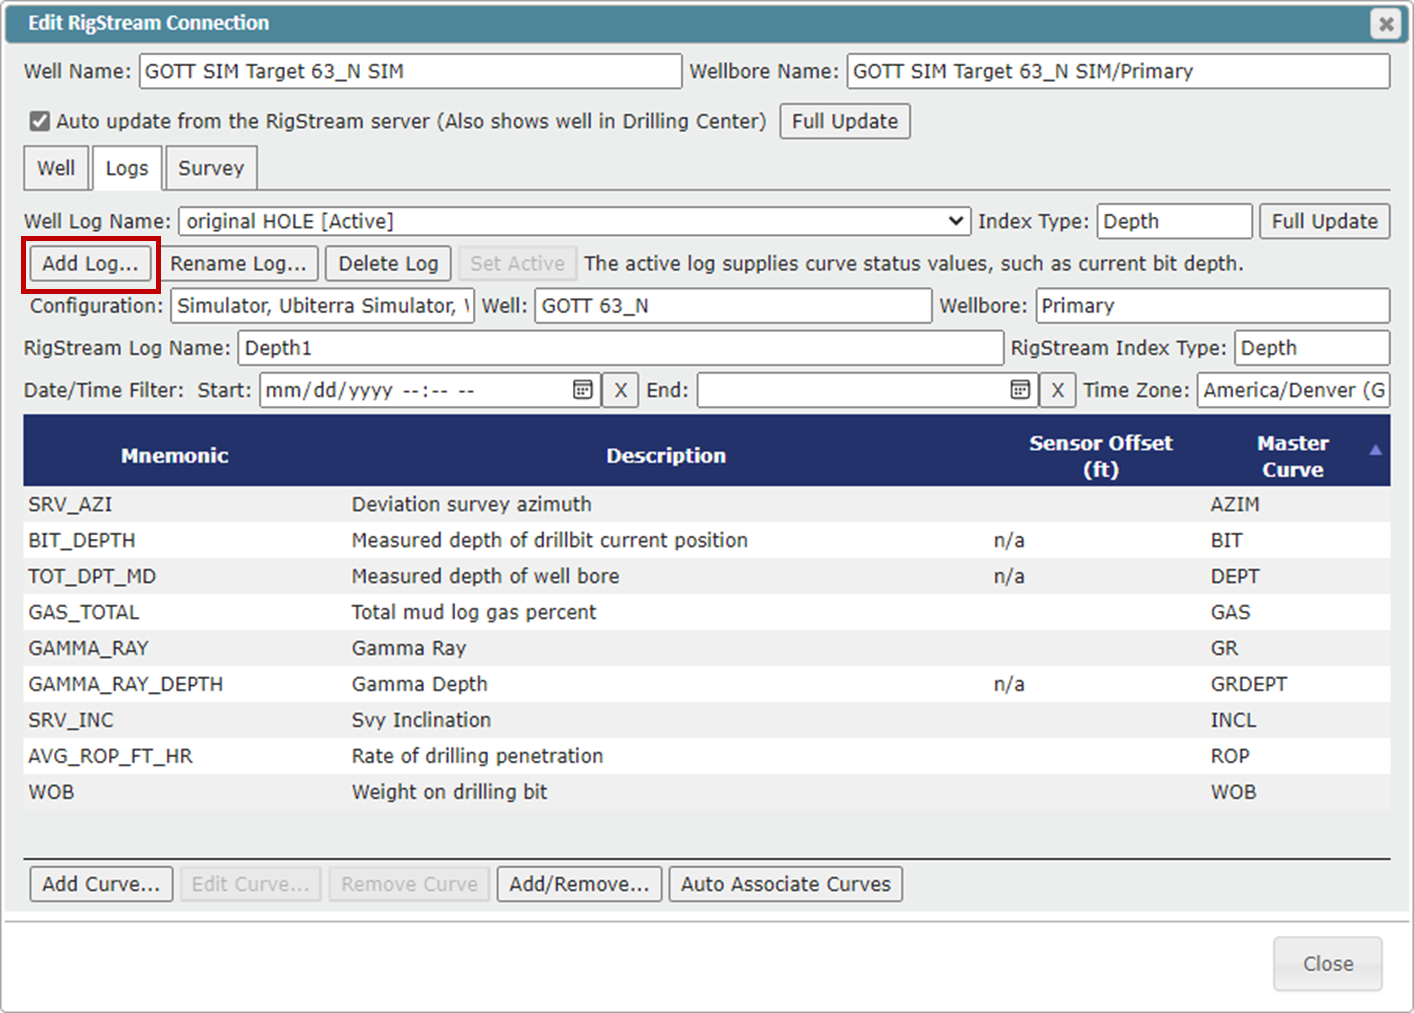
Under the Logs tab, click the “Add Log” button
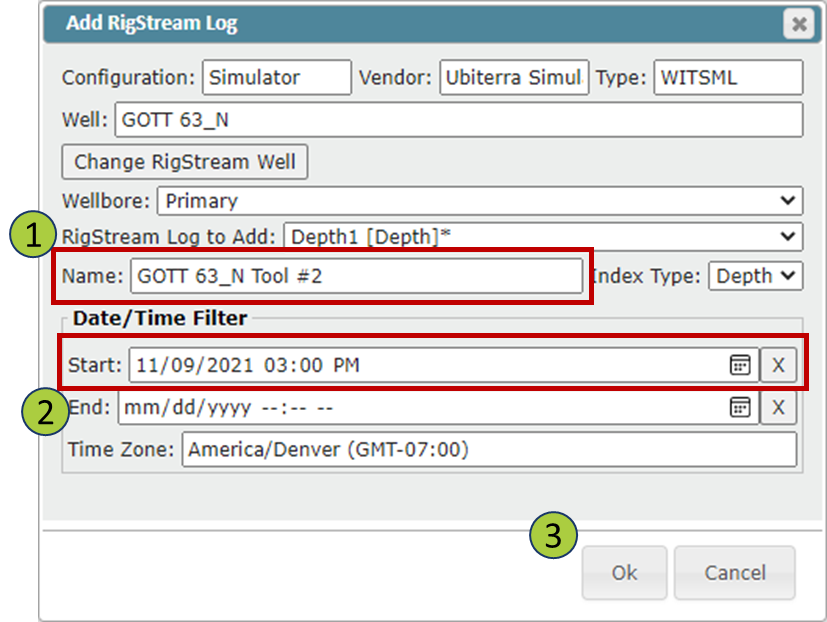
Select the correct RigStream data and give the "New Log" an appropriate name
Set a Start Time Filter for this "New Log", this will prevent the inclusion of data from the "Original Log".
Start Time Filter: The day and time the new tool was put downhole
Click “Ok” to create the new RigStream Log
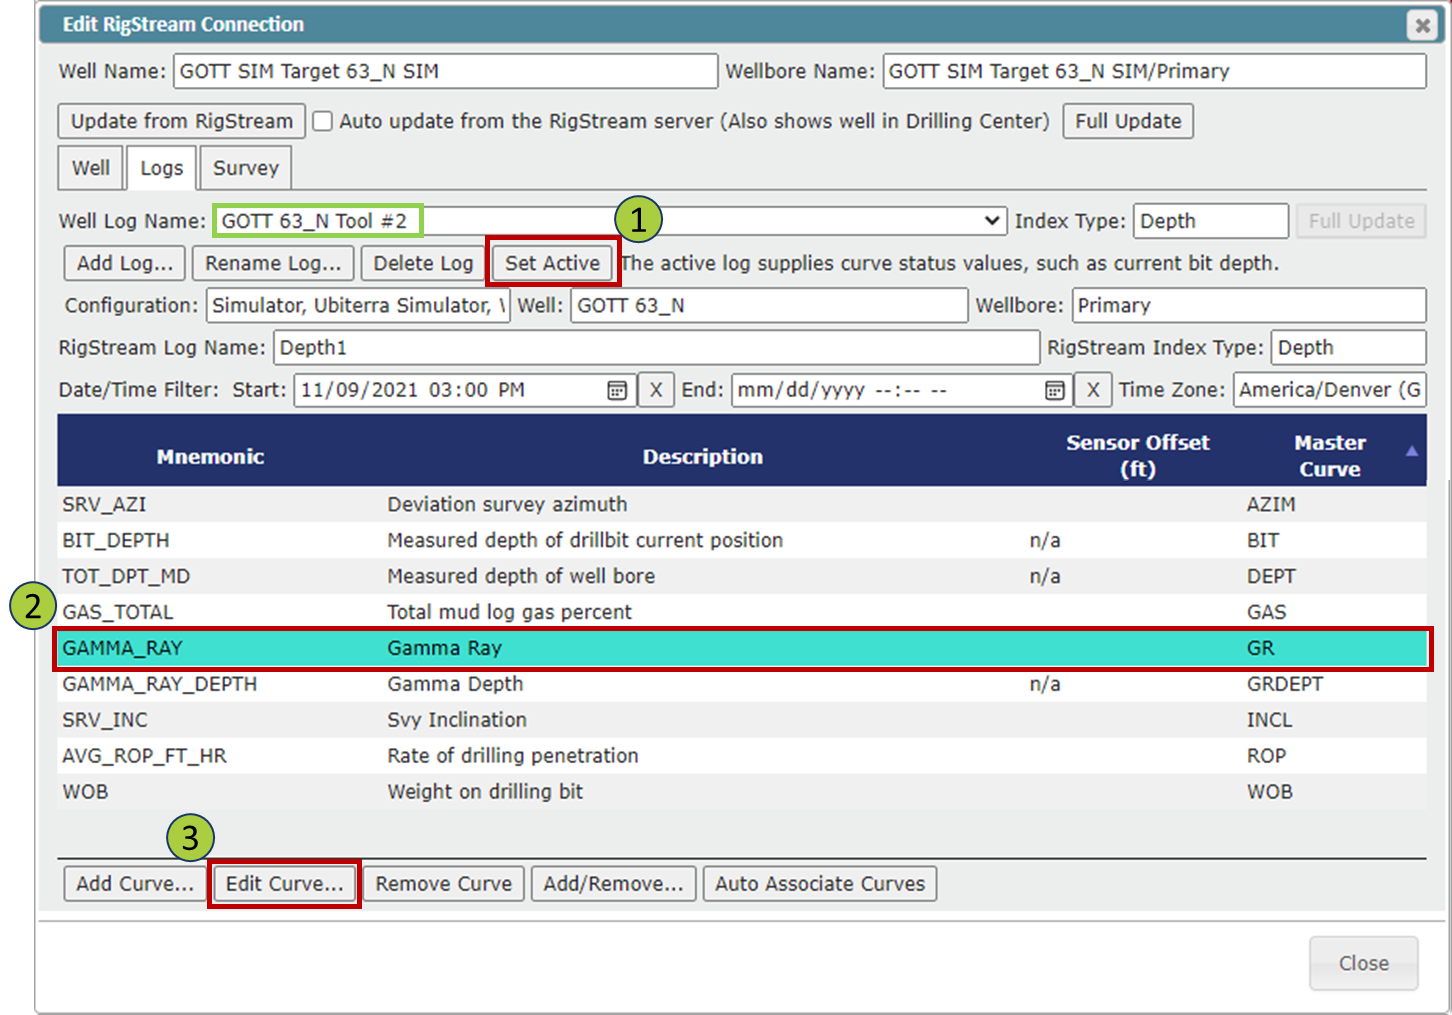
In the Well Log Name dropdown, select the "New Log" and click the “Set Active” button
Select the gamma-ray log in the list below
Click the "Edit Curve" button
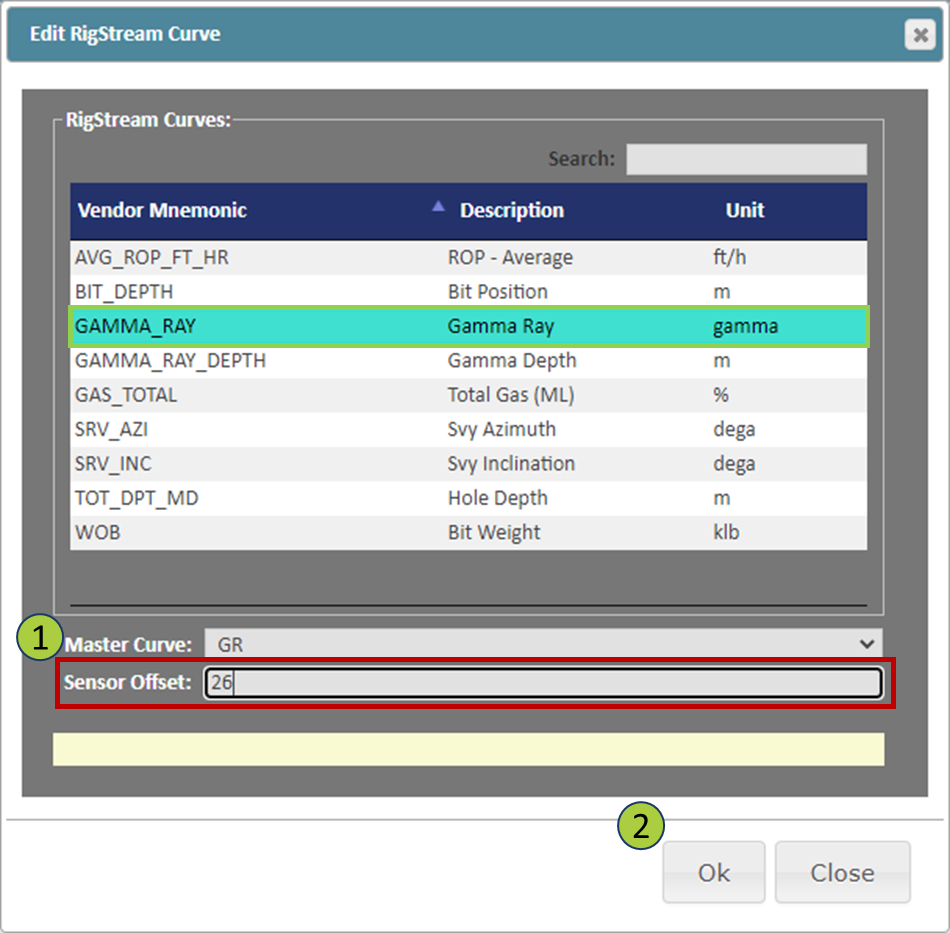
Make sure the gamma-ray log is selected, then input the "Sensor Offset" for the "New Log"
Click "Ok" to save your changes
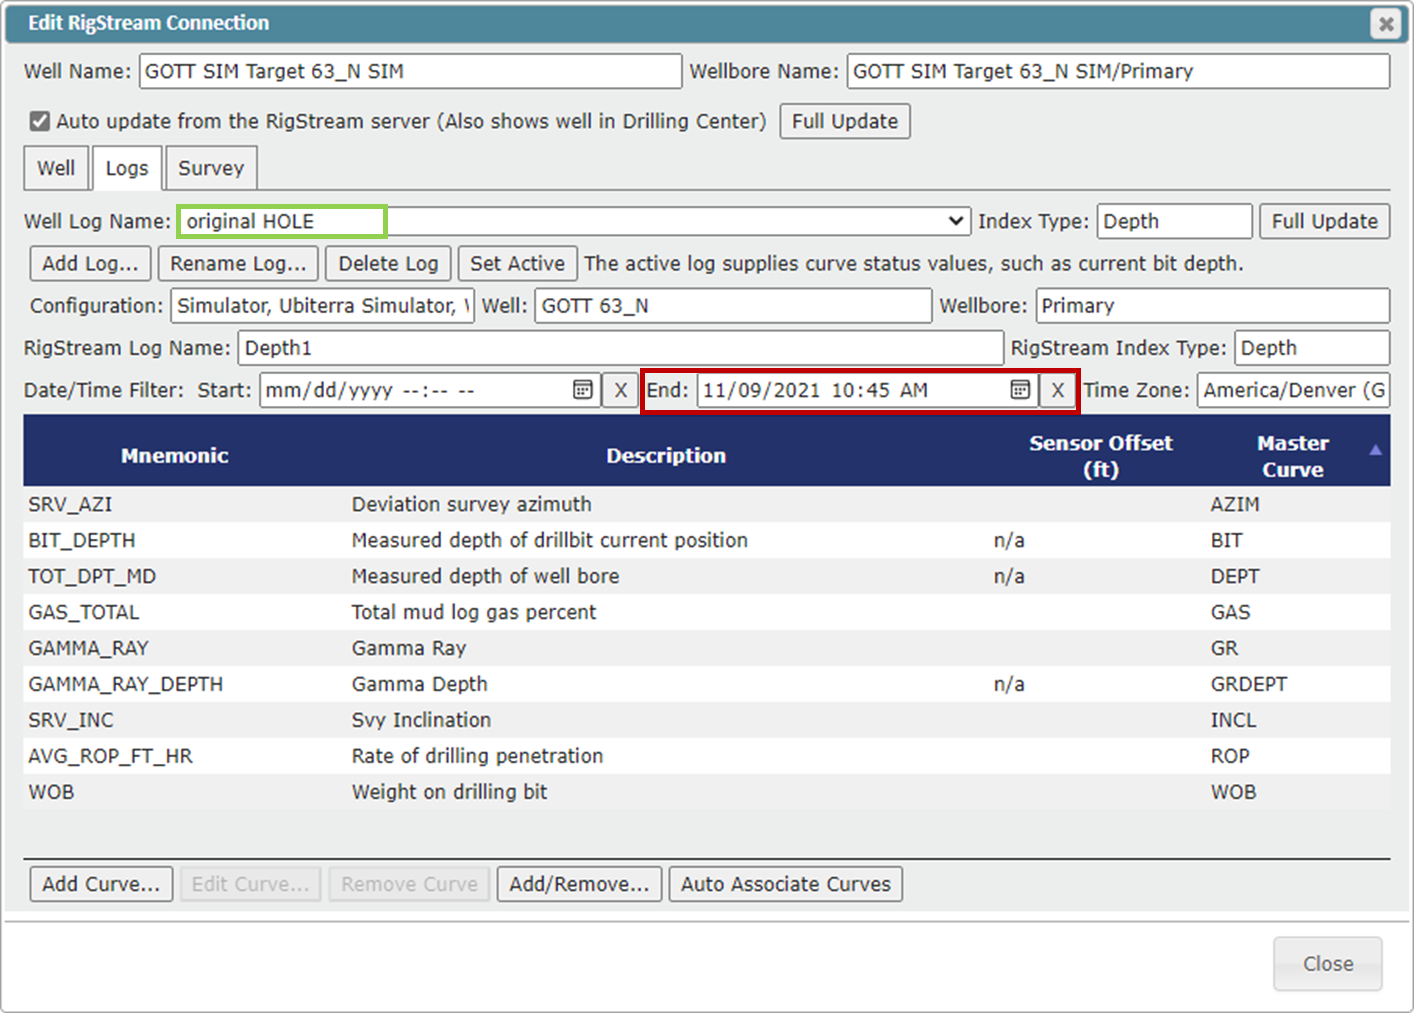
Back in the RigStream Configuration pop-up window, choose the "Original Log" in the Well Log Names dropdown
Under the Date/Time Filter, apply an End Time Filter corresponding to when they changed tools
Note: The End Date/Time Filter for the "Original Log" should be before the “Start” time filter you applied to the "New Log"
Double-check that the "New Log" is the “Active” log, then close out of the RigStream Connection pop-up window
Note: The "Active" log will have "[Active]" after the log name
Making the new RigStream Curve the Active LWD Log:
There are two ways you can make this new RigStream Curve the active LWD Curve.
Create a Splice Log and use the Splice Log as the LWD Curve (Recommended). See this article for more information: Creating a Spliced Log in ZoneVu
Add this new RigStream Curve to the Geosteering LWD Curve list and set it as active and display the other RigStream Curve in the Vertical and Horizontal Correlation Tracks. See below for a walkthrough of this second option.
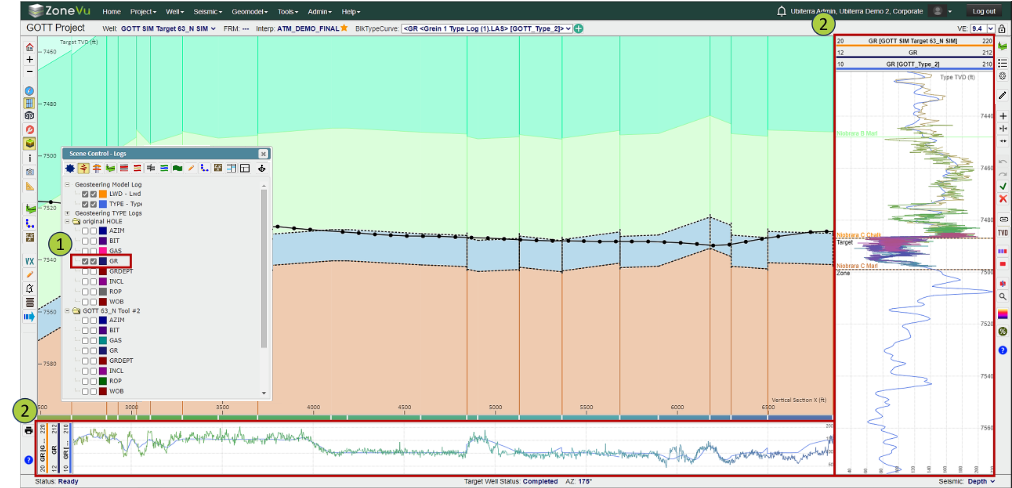
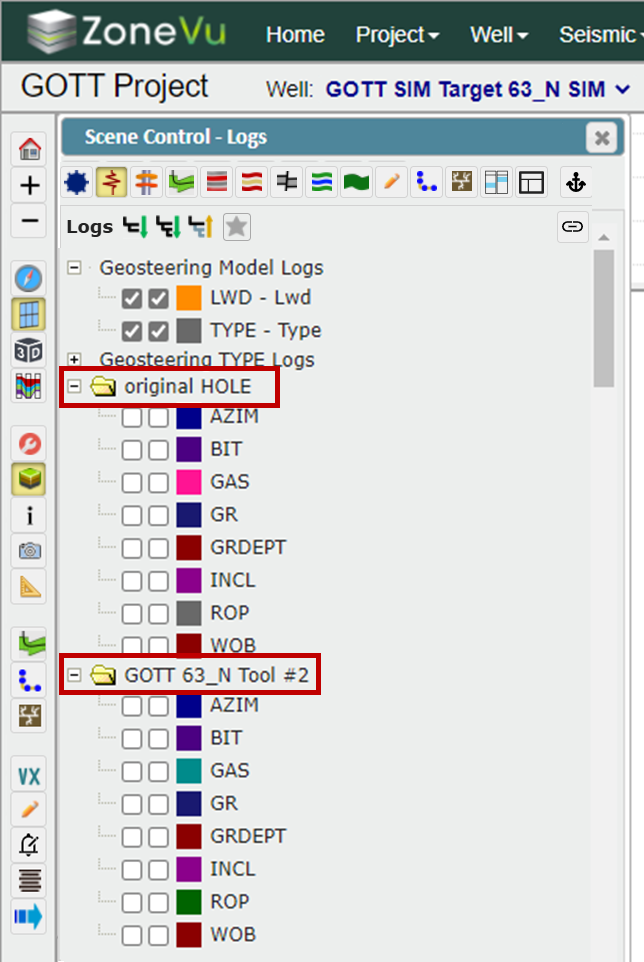
Open the Scene Control, open the Logs tab and make sure both the "Original Log" and the "New Log" are present
Note: It may take several RigStream updates to download all the data
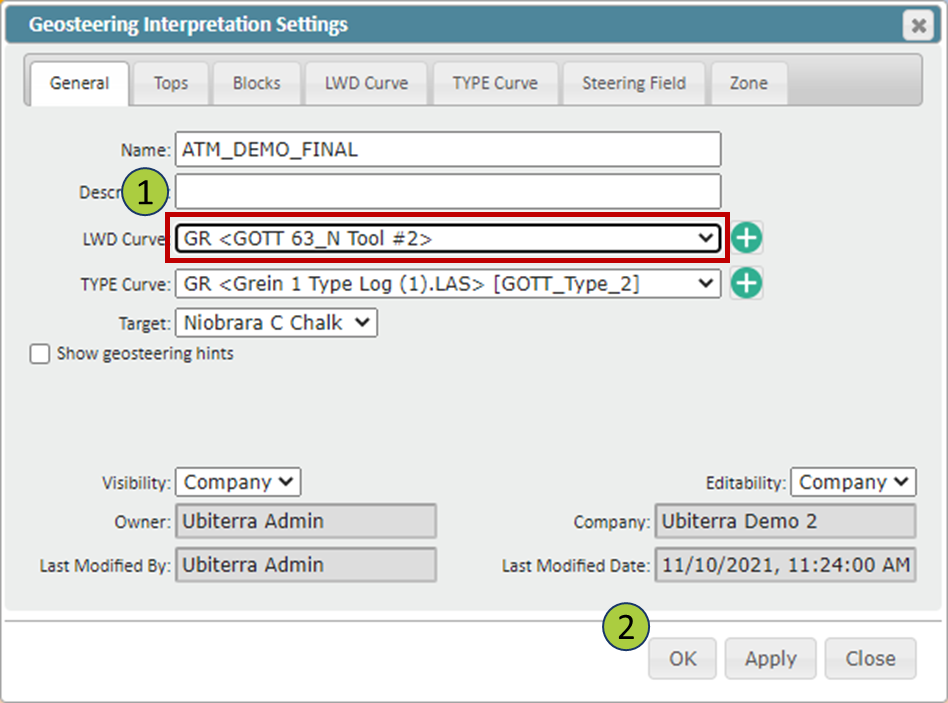
Now open the Geosteering Interpretation Settings and select the green "+" button next to the "LWD Curve" dropdown
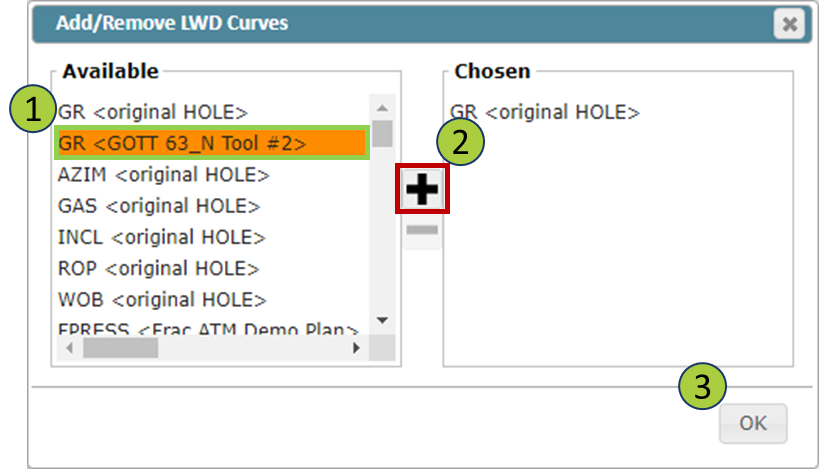
In the Add/Remove LWD Curve pop-up, select the "New Log's" gamma-ray curve
Click the "+" button to add the curve to the "Chosen" Logs
Click "Ok" to save your selection
Back in the Geosteering Interpretation Settings pop-up, assign the "New Log's" gamma-ray curve as the active LWD curve by selecting it in the "LWD Curve" dropdown
Click "Ok" to save your changes

Back in the Scene Control, make sure the "Original Log's" gamma-ray log is turned on in the Horizontal and Vertical Tracks
Also make sure that the “Original Log's” and “New Log's" gamma-ray curves do not overlap and have consistent relative scaling
Note: On the Horizontal and Vertical Tracks, the curve with the orange bar is the LWD Curve, the dark blue bar is the "Old Log's" gamma-ray curve, and the light blue bar is the Type Well Curve