When drilling a sidetrack in ZoneVu, most real-time data providers (Totco, Pason, etc.), don't log a new wellbore in their system. Instead, they add the new data under the previous wellbore. This results in both the data from the original wellbore and the sidetrack being displayed on top of each other. In order to correct this, you must go into the RigStream connection in Zone and clip the overlapping data from the original wellbore.
General Workflow:
Copying the GR curve in RigStream and clipping it BEFORE the point of the sidetrack
Setting up the original GR curve in RigStream to begin AFTER the point of the sidetrack
Displaying both curves in the Viewer
You can also Splice these two logs together using the "Splice Log" feature. See this article for more details: Creating a Spliced Log in ZoneVu
Note: It's our recommendation that you create a new Well in ZoneVu to preserve the data from the original Wellbore. See this article for more details: Creating a Sidetrack in ZoneVu
Detailed Workflow:
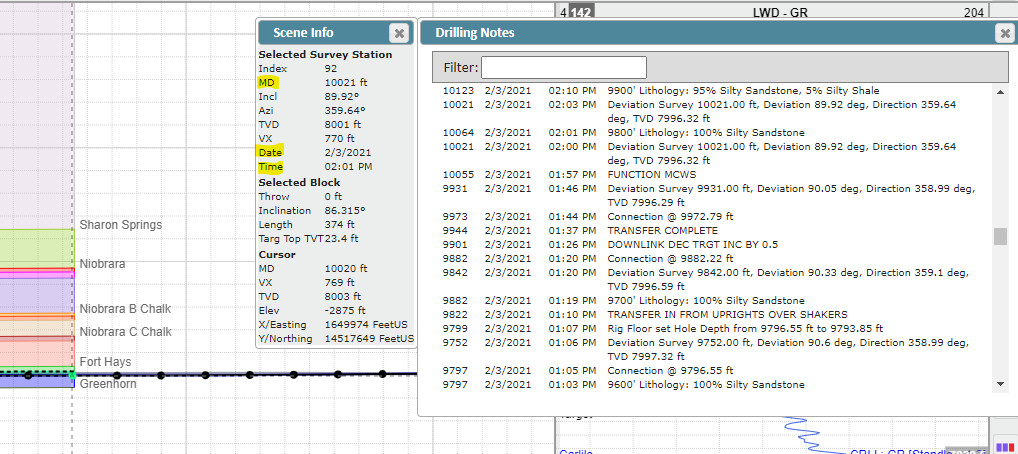
Determine the time and date that the tool change occurred. You can do this by logging onto your external Pason/Totco account, asking the rig, or placing your cursor directly on top of the last survey data point in the viewer and reading the information in the "Scene Info" tab. In this example, we will assume that the sidetrack occurs at 10,021 ft MD. Note the date and time (2/3/21, and 02:01 PM); you will need this information later.
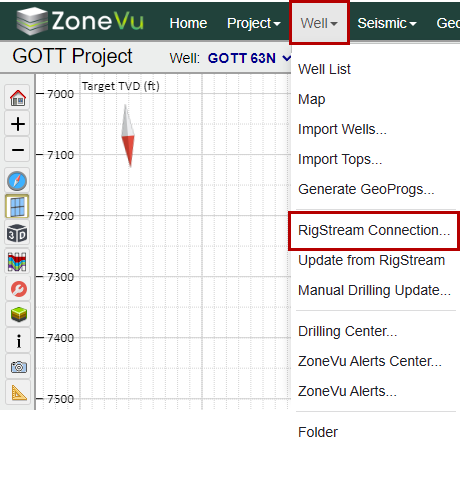
At the top dropdown menu under "Well", select "RigStream Connection"
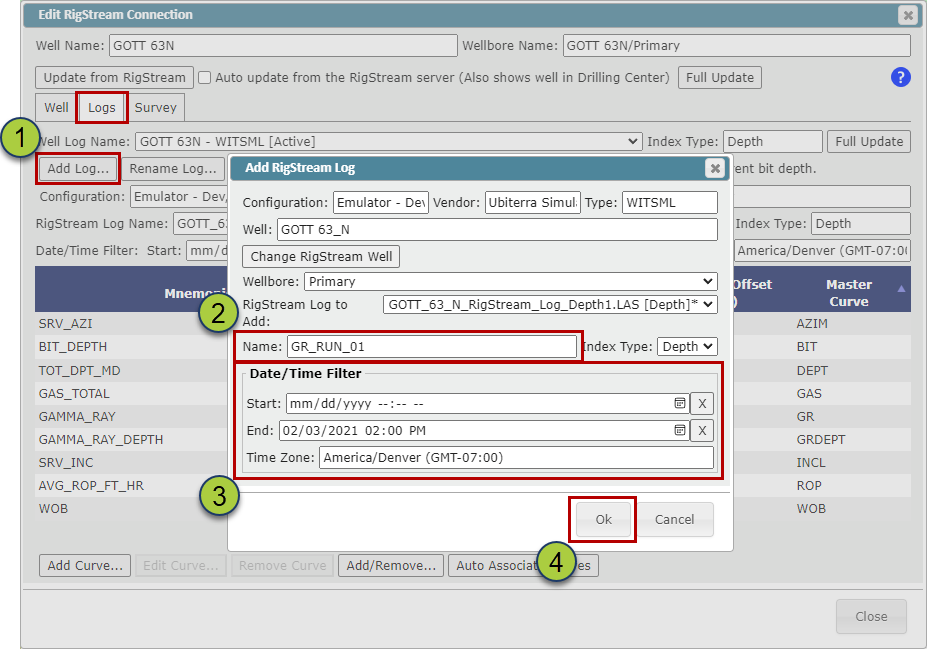
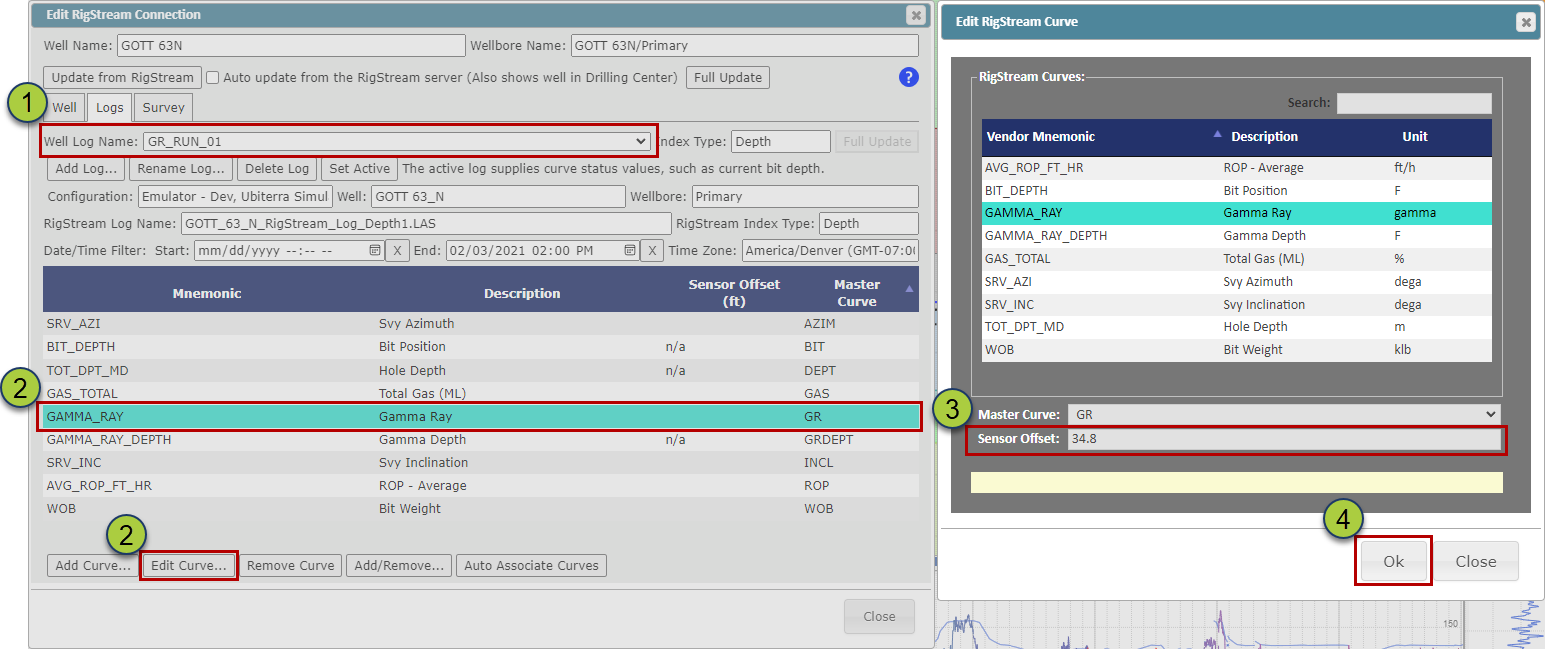
Next, you will need to create a new RigStream Log for the Original Wellbore
Select the "Logs" tab and click the "Add Log" button
Add a name for the log (in this case, we called it GR_RUN_01)
Under the DATE/TIME FILTER, set the END to the time and date that we recorded earlier (02/03/2021 02:00 PM)
Click the "OK" button to create the new RigStream Log
Next, you will need to add the new GR-Tool Sensor Offset so that RigStream can correctly depth correct the WITSML data
Make sure that the "Well Log Name" dropdown shows the new name that you selected "GR_RUN_01"
Select the Gamma-Ray curve in the Curve List, and click the "Edit Curve" button
In the "Edit RigStream Curve" dialog box, enter the Sensor Offset. In this case, the offset is 34.8 ft. Reach out to your MWD company or drilling engineer to find out the distance from the MWD sensor to the drill bit
Click the "OK" button to save the updated Sensor Offset
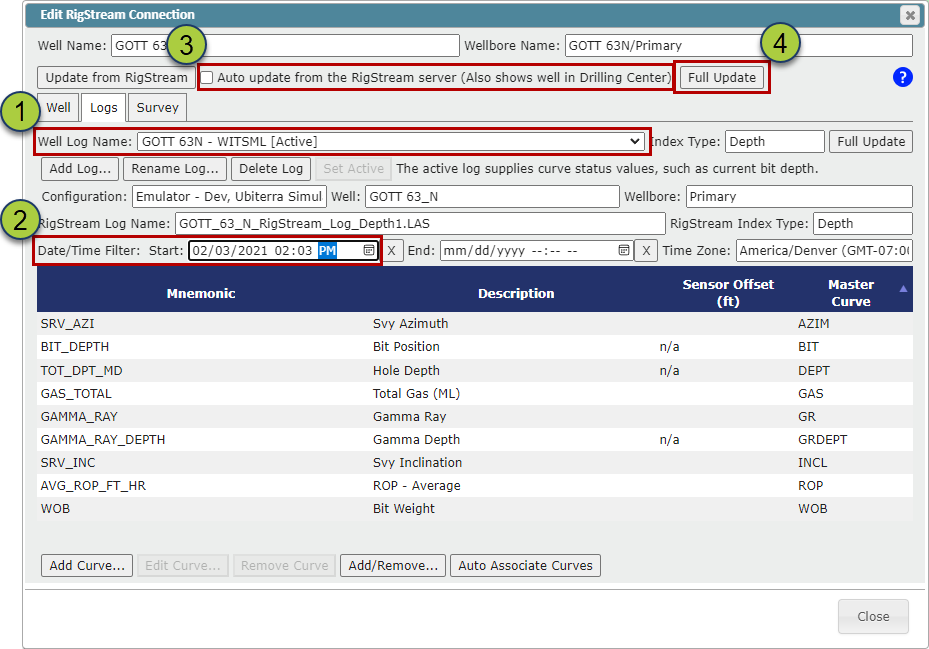
Next, you will need to add a Start Time Filter to the Active RigStream Log and make sure RigStream Auto Updates are set
Change the "Well Log Name" dropdown to the original WITSML Log
Change the "Date/Time Start:" to match the date of the tool change (02/03/2021 02:03 PM)
Make sure the "Auto Update from the WITSML server" is checked on
Click the "Full Update" button, this will initiate a full data pull from your WITSML provider. Close out of the "Restream Connection" dialog box and return to the Viewer.
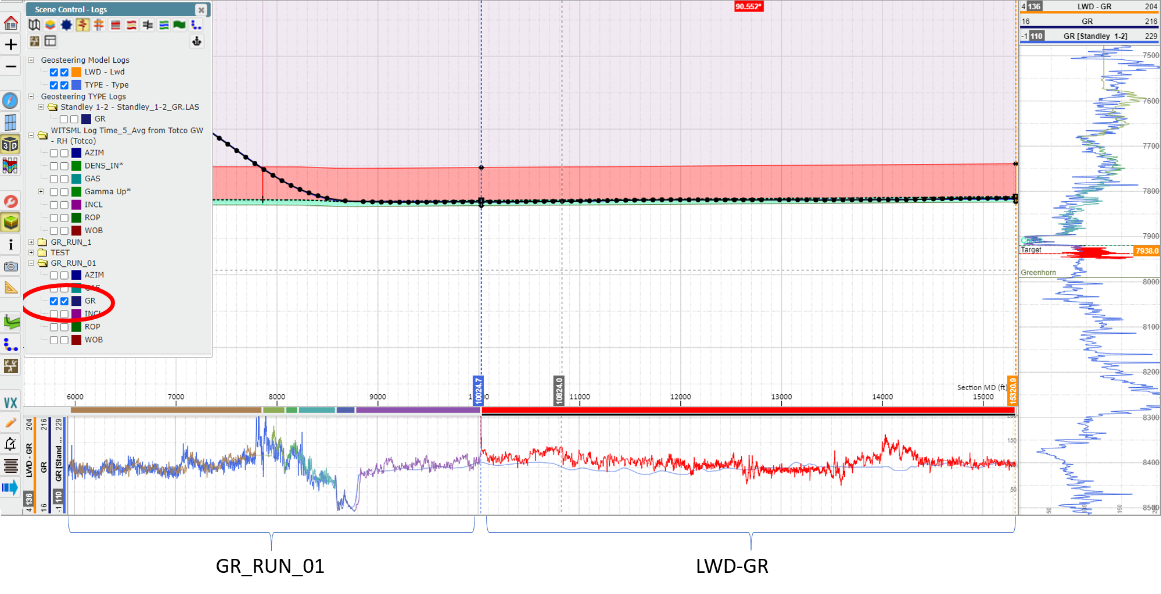
In the Viewer, select the "Logs" tab in Scene Control and select the checkbox for GR under the GR_RUN_01 folder. This will turn on the pre-sidetrack GR. The post-sidetrack GR, shown in red in the image starts at the same point that the GR_Run_01 ends. If the log scales for the LWD-GR and GR don't match in the horizontal or vertical tracks, adjust the scales by clicking on the log header.