
Exporting a .SEGY from Kingdom:
By default, Kingdom will export a .SEGY volume with the same datum as the Project it is exported from.
You will need to use this Datum when importing the .SEGY into ZoneVu
You are given the option to depth clip the Top and/or Base of a seismic volume when exporting a .SEGY
Putting a number in the “top clip” input will clip out that footage of the seismic below the Kingdom Project Datum
Example: If you input 3,000’ into the Depth Clip option, you will clip out the top 3,000’ of your seismic Volume.
It's important to note that when you clip the top of a Seismic Volume, the datum for this “Clipped .SEGY” will become the new Datum for the .SEGY
Example: if your Kingdom Seismic Project Datum is 7,000’ Elev and you clip the top 3,000’ off the volume on export, the Datum Elevation for this “Clipped .SEGY” will now be 4,000’ Elev.
If you clip the bottom off your Seismic Volume, the .SEGY Datum will not change and the .SEGY will use the Kingdom Project Datum.
Exporting Fault Data from Kingdom:
Kingdom allows you to export the Fault picks from your Kingdom Project
ZoneVu’s preferred Fault Pick export format is GeoQuest Card 7
ZoneVu does not import Fault Surfaces, instead ZoneVu will create the Fault Surfaces from Fault Picks
It’s important to note that fault picks are exported in Depth Below the Project Datum
If you are loading fault picks into a seismic volume that has had the top of the volume clipped (Depth Clipped), you will specify the correct datum when importing the Fault Picks
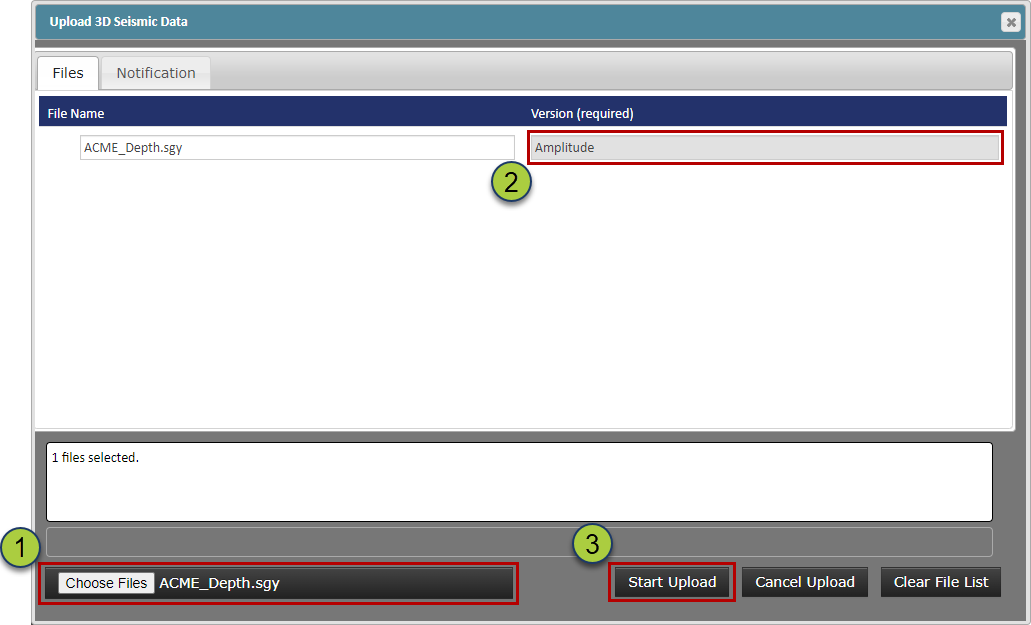
Importing a .SEGY File:
Select the Seismic Survey you want to load the .SEGY into
On the “Data” tab, click the “Import” button to open the “Seismic Volume Importer” pop-up.

Drag & Drop or choose the SEGY file
Give the Seismic Volume a unique “Version Name”
Click the “Start Upload” button to import the SEGY
Registering your Seismic Survey:
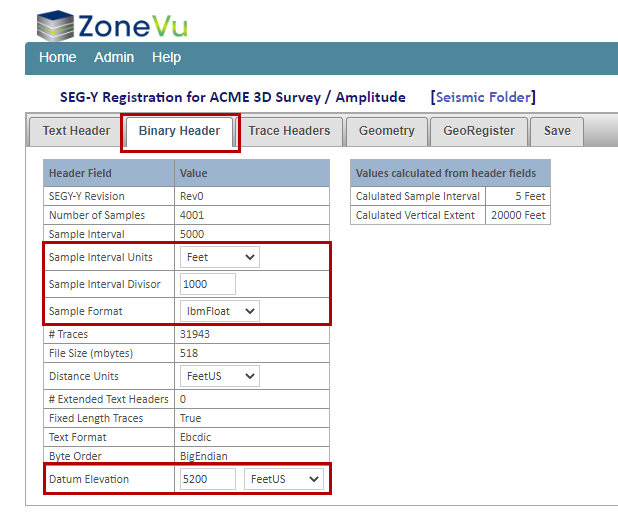
Once the SEGY has finished loading, select the SEGY in the list and click the “Register” button to bring up the “Seismic Registration” tab

On the “Binary Header” tab, input the Sampling Interval and the Datum Elevation
Important note about Kingdom SEGY Export: When you clip the top of a Seismic Volume while exporting a SEGY, the datum for this “Clipped .SEGY” will become the new Datum for the .SEGY If you clip the bottom off your Seismic Volume the .SEGY Datum will not change and the .SEGY will use the Kingdom Project Datum.
Example: if your Kingdom Seismic Project Datum is 7,000’ Elev and you clip the top 3,000’ off the volume on export, the Datum Elevation for this “Clipped .SEGY” will now be 4,000’ Elev.
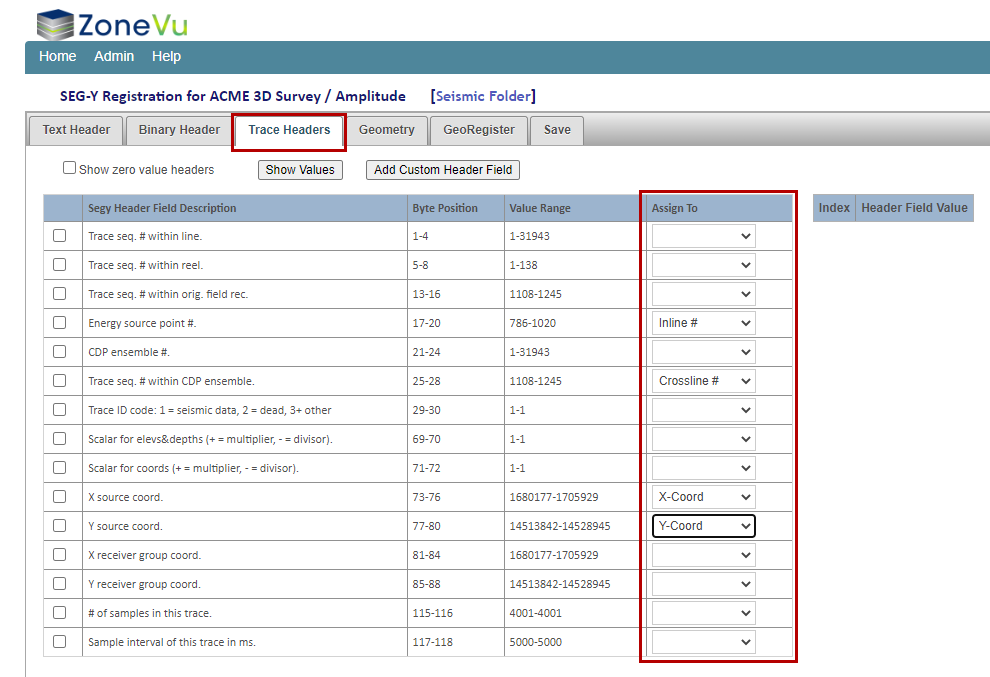
On the “Trace Headers” tab, you will need to define the bit locations for the Inline #, Crossline #, X-Coordinate, and Y-Coordinate. The bit locations can be found on the “Text Header” tab
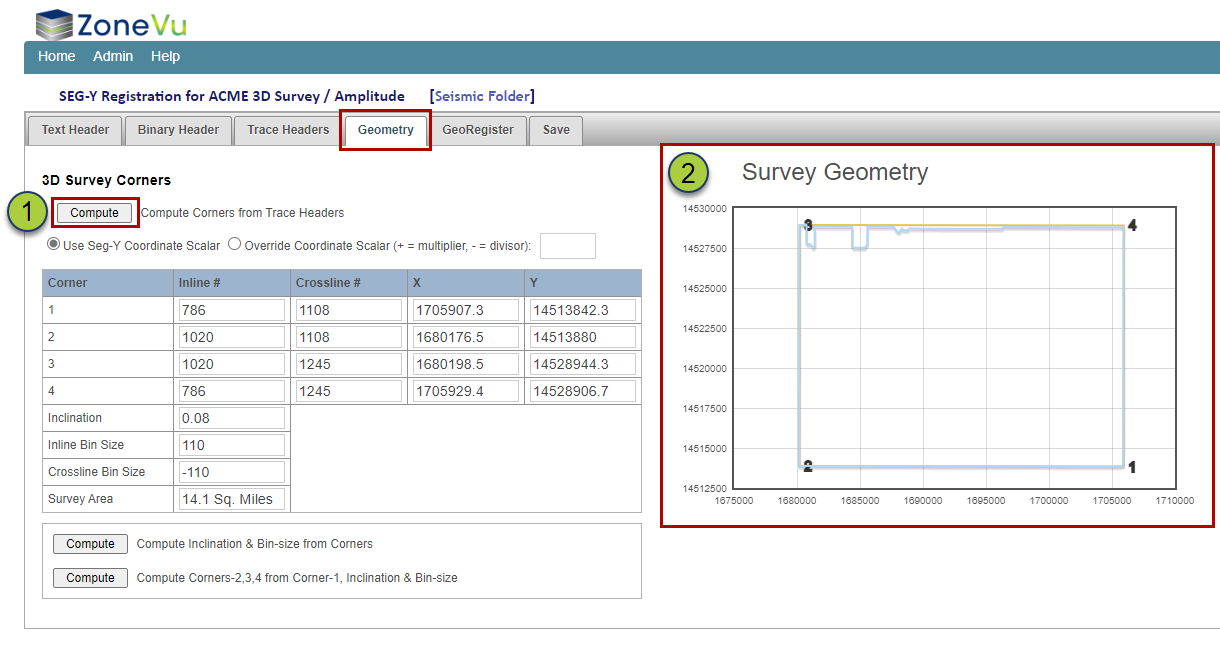
Next, go to the “Geometry” tab and click the “Compute” button.
ZoneVu will then calculate the corner locations and draw the Survey Geometry in the right grid box. Make sure to check that the Survey outline looks correct.
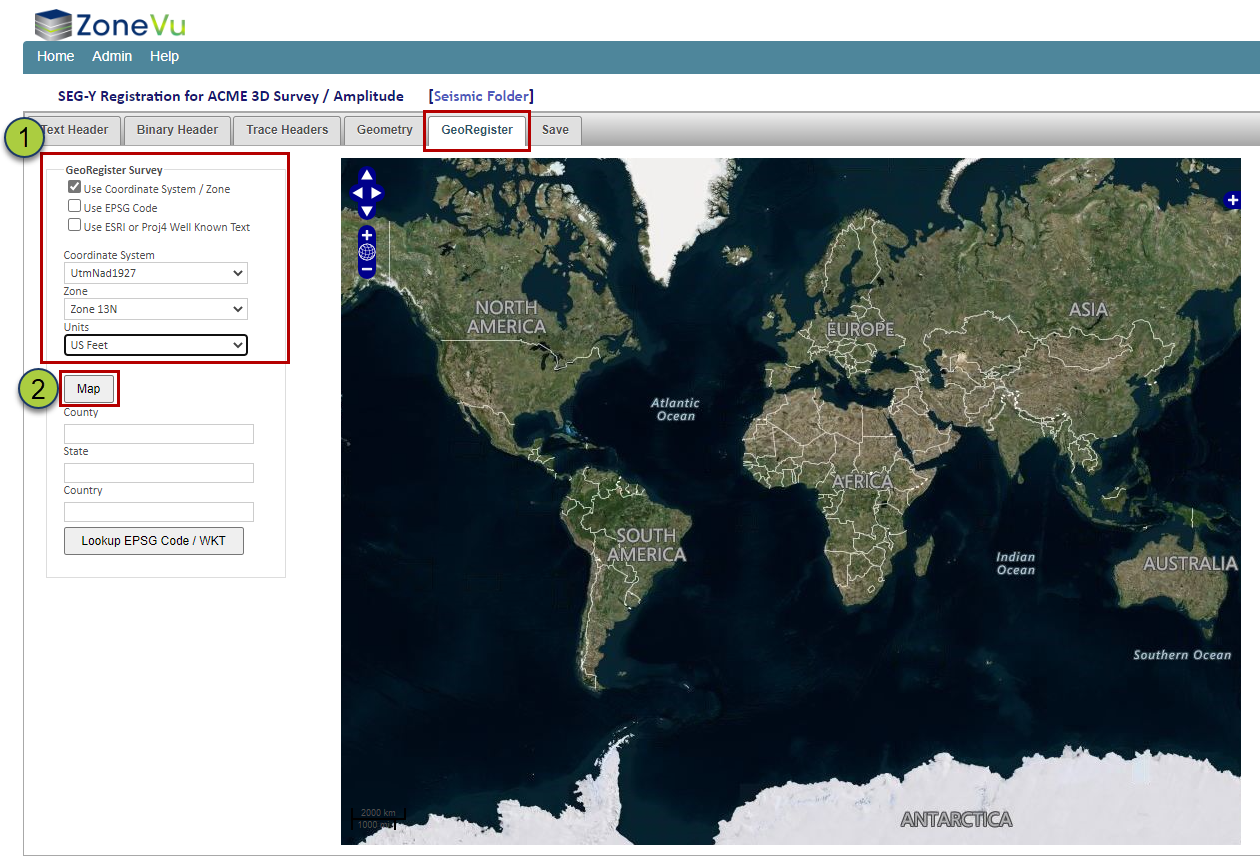
Next, go to the “GeoRegister” tab and assign the correct Coordinate system for the Survey. Then click the “Map” button to have ZoneVu draw the survey boundary on the map. Make sure to check that the Survey is being drawn in the correct location on the map.
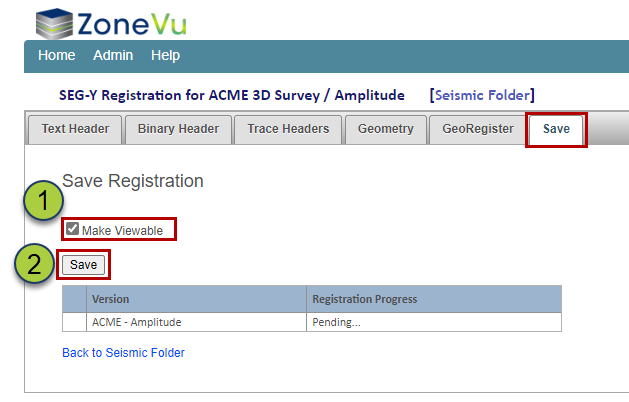
Finally, go to the “Save” tab, check the “Make Viewable” checkbox
Then click the “Save” button to have ZoneVu register the Seismic Volume
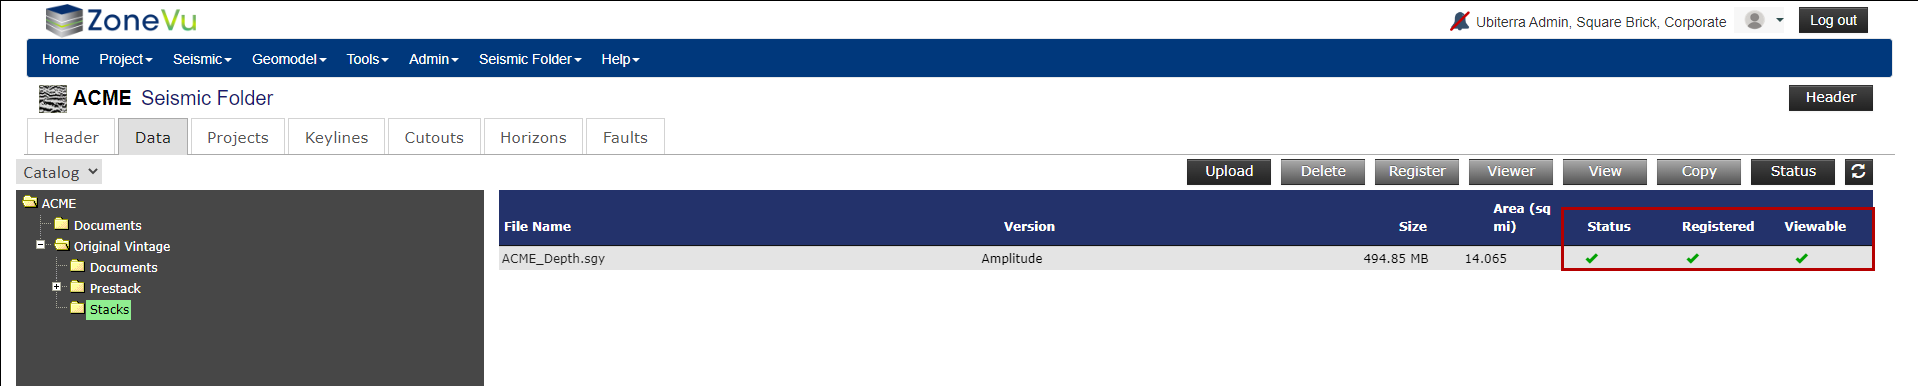
Once ZoneVu has finished Registering the Survey, you will see a green checkmark under the Status, Registered, & Viewable columns. This indicates that your Seismic Volume is ready to use in the Viewer
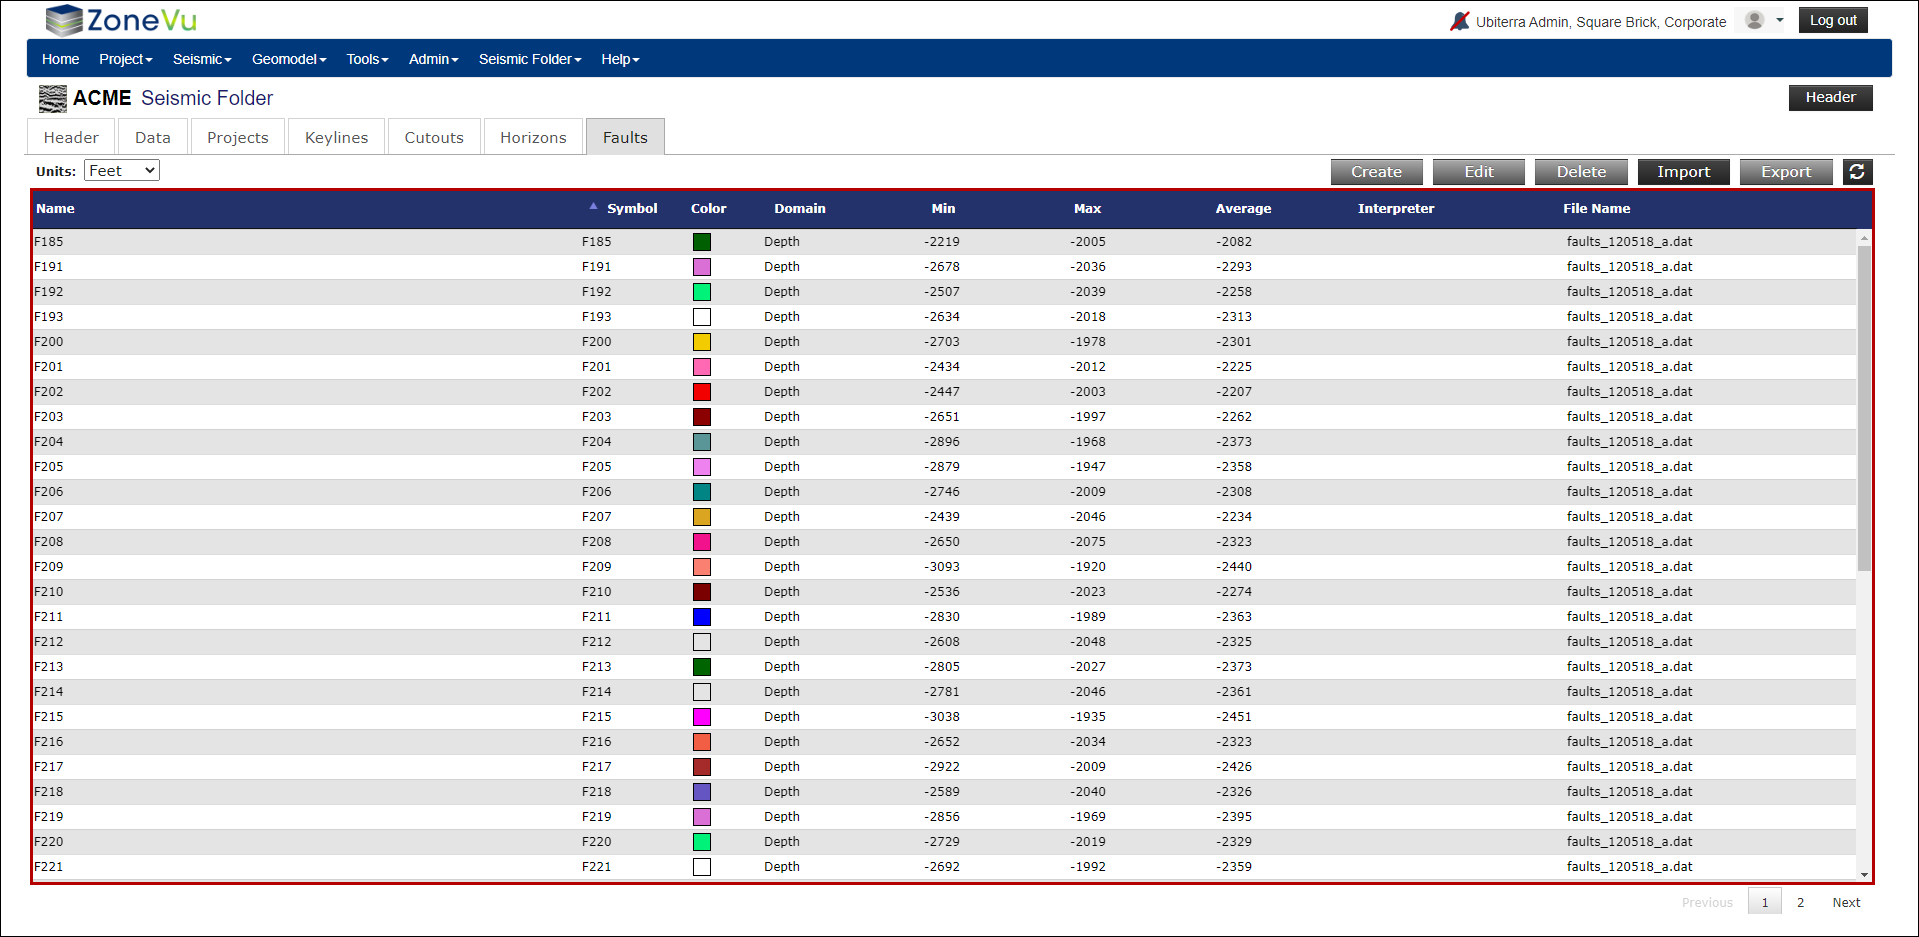
Importing Fault Picks:
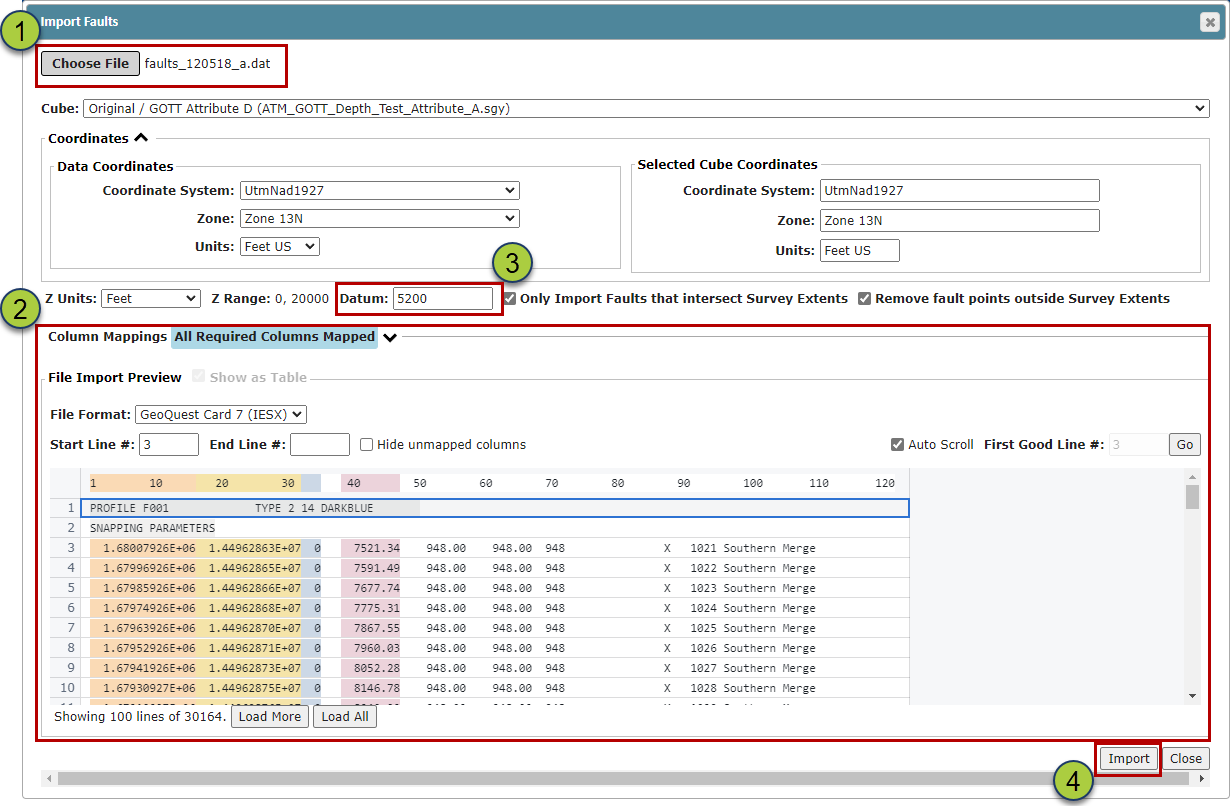
Once back in the Seismic Folder, navigate to the “Faults” tab and click the black “Import” button to bring up the Fault Import pop-up

Drag & Drop your Fault Pick file or use the File Navigation pop-up (Ideally GeoQuest Card 7 format)
Make sure all the required data has been selected
If the associated Seismic Volume has been depth clipped (which will change the datum for the seismic volume), make sure the datum used in the Fault Import dialog box matches your Kingdom project's datum and not the SEGY datum
Click the “Import” button to load the Fault Picks
The imported Faults will now appear in the Fault List. Select a Fault to edit its properties
Related Articles: